
Canvasback’s Round-headed Brother

Redheads will always be associated with Canvasbacks in my mind. They are both famous as table fare because they dine on succulent aquatic plants. They were never abundant on Long Island during my lifetime. From historical records, though, they were once an important bird on our South Shore Bays. My hypothesis is that they were much more common before our inlets – between the bays and the Atlantic Ocean – were maintained as hardened and “permanent” navigation portals to the sea. Before the era of mechanized dredging, inlets would open and close in response to hurricanes, nor-easters and other big storms. Sometimes inlets would remain closed for many decades. For example, I think Shinnecock and Moriches Bays had no regular inlets for about a century, until the historic hurricane of 1938. They drained west, through Narrow Bay into Bellport and Great South Bay – and finally mixed with the Atlantic at Fire Island Inlet – which has remained open since George Washington commissioned the first lighthouse there in the late 1700s. As a result, the eastern bays were most likely much fresher, enjoying the waters from scores of creeks draining the mainland but without mixing with the ocean’s salt. Such brackish conditions favor plants like Wigeon Grass (Ruppia maritima) – an excellent food for the likes of Redheads. And, even in the saltier Great South Bay, the succulent Eel Grass (Zostera marina) was much more abundant before the fungus-caused blight of the 1930s on both sides of the North Atlantic. So, the old accounts – late 19th and early 20th century – of hundreds of Redheads being taken from battery rigs and shipped by rail into New York City ring true.
Having begun carrying a shotgun in 1965, I have taken only one Redhead on Great South Bay. Nevertheless, I could always find small flocks on certain of our freshwater ponds around Long Island. I took these photos a few years ago in Islip. The pond right behind the McDonalds there often holds this species – as well as Ruddies and Lesser Scaup – vegetarians all.


Preparation & Painting – General
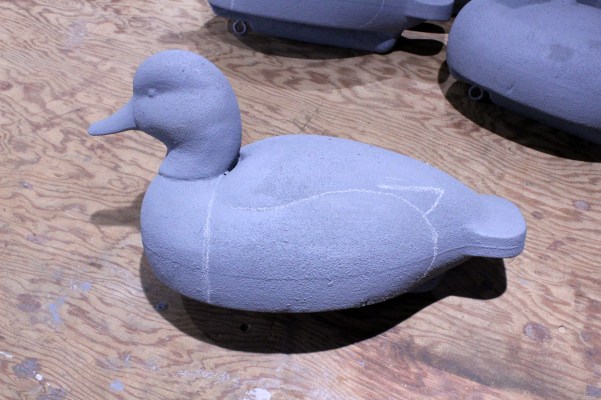
I applied my usual coating of epoxy + sawdust to these foam birds from Homer Decoys ( http://www.homerdecoys.com/ ) before painting. I sand the heads with 80-grit then wipe with lacquer thinner before applying the epoxy coating – 635 Thin Epoxy with Medium Hardener from http://www.uscomposites.com/epoxy.html sprinkled with fine sawdust from my band saw. The foam bodies get the same coating but require no sanding or cleaning beforehand.
I fasten the heads with s/s screw eyes and washers; the head is set in caulk to prevent rotation in use – and to prevent the anchor line from wedging between the head and the body.
The entire birds gets a coat of grey latex primer once the caulk at the head-neck joint sets up.
Brushes
Here are the brushes I use on gunners:
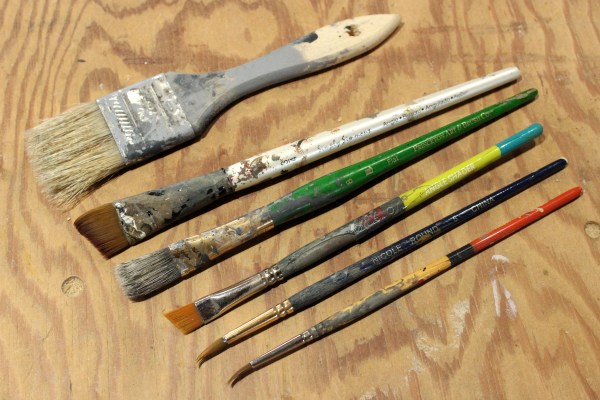
From top to bottom in the photo:
1) 1.5 inch Chip Brush. I use this for priming birds and for large areas of color. As they get older and a bit shop-worn, they become useful for stippling, too.
2) 3/4-inch Angle Shader. I paint 90 percent of the birds with this brush. It can cover large areas but also allows for a nice crisp edge when I want it.
3) 3/4-inch Flat. These coarse bristles allow for stippling and also for softening lines where two color patches meet. On the Hens, I use this for the barring on the sides.
4) 3/8-inch Angle Shader. I use this for smaller patches like the bill or speculum. Easy to keep a crisp edge.
5) #5 Round. Only for small areas like bill details, eyes, feather edges.
6) # 3 Round. For the smallest jobs: iris and feather edges in the speculum.
I am notoriously careless with my brushes – so each costs no more than a couple of dollars.
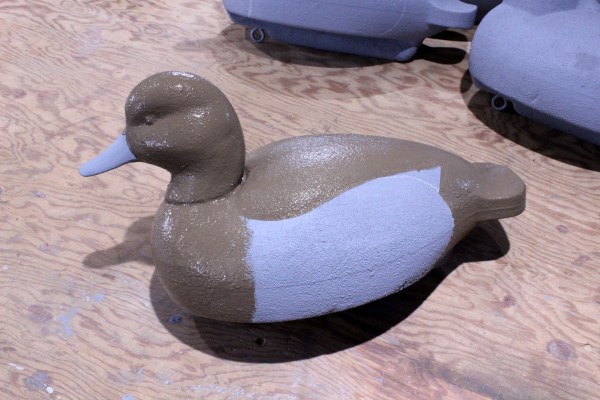
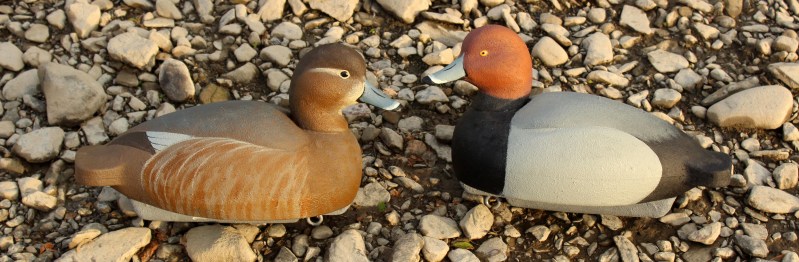
Painting the Drakes
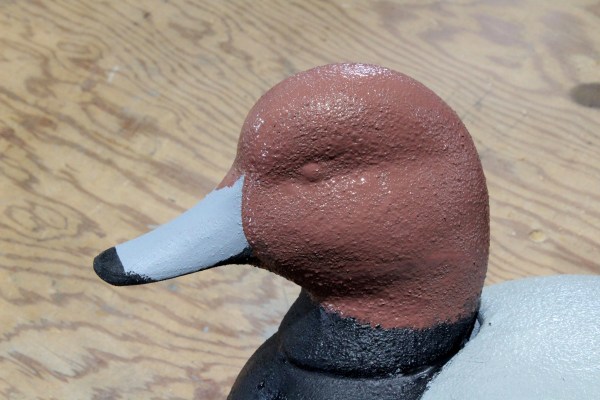
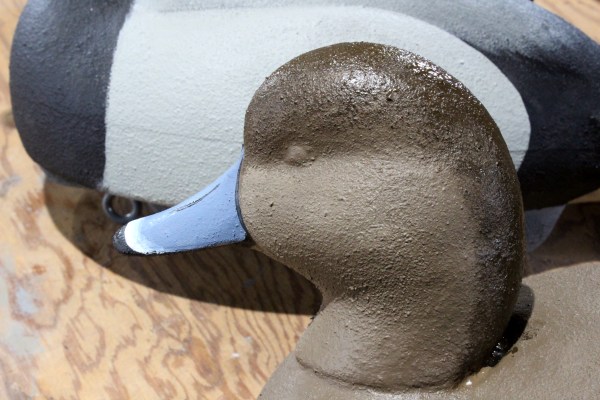
Once the primer was dry, I painted these Redheads with sample jars of Behr house paints from Home Depot ( http://www.homedepot.com/b/Paint-Paint-Colors/Exterior-Paint/N-5yc1vZcaw8Z1z0q3xg ). Here are the colors I used on the Drakes. I always try to “re-use” the same colors among different species so I – or you – do not need to buy lots of one-use jars. But, I do try to get things correct for each species. Note, for example, that the base color on the Redhead is not the same as on the Canvasback. The Redhead has a rosy cast to its head and so I use Oxblood first on the head. The rustier Canvasback gets Moroccan Henna. Of course, for gunning birds, you could use just the Morrocan Henna or the Artisan for both Drakes and I am sure you would attract no fewer Redheads or Cans within reach of your muzzle.
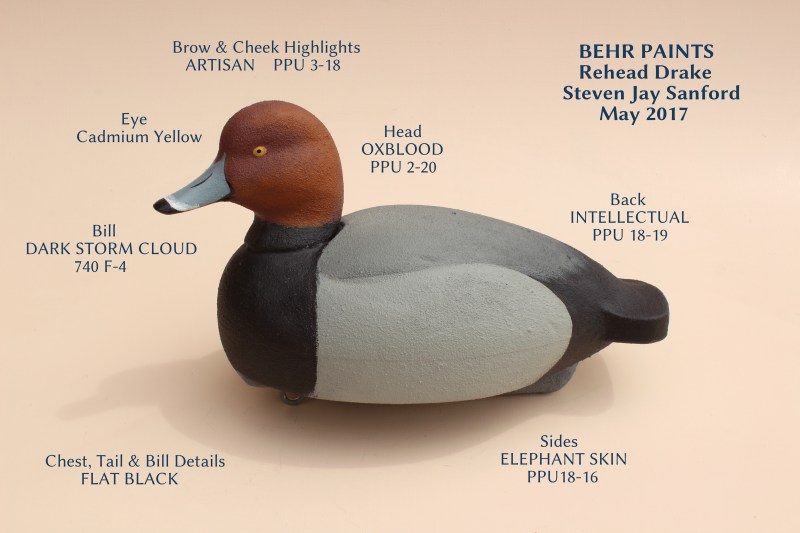
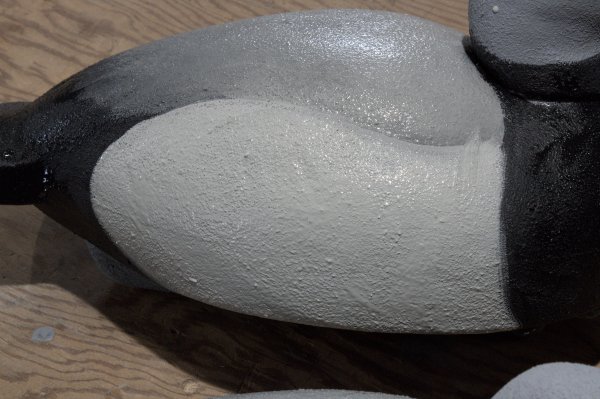
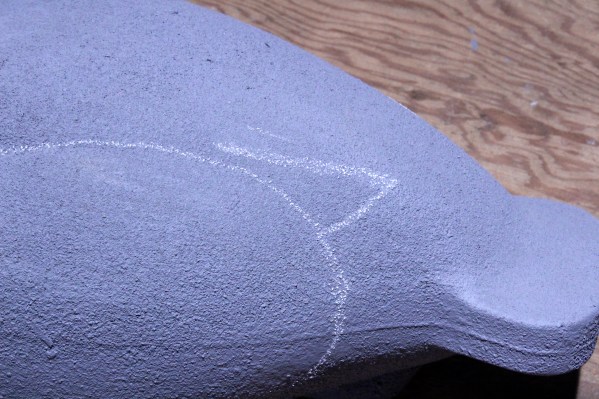
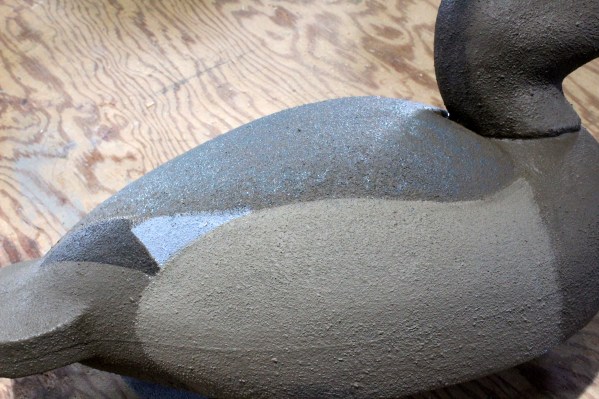
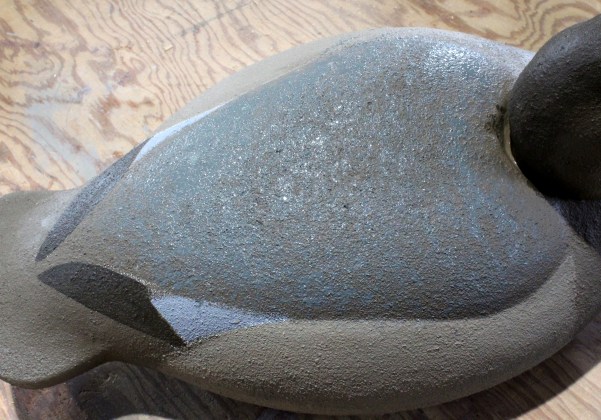
The major color areas match the molded contours. I dropped the chest-side break straight down from the “shoulder” – and chalked in the speculum. I did not paint the speculum on the Drakes but did on the Hens.
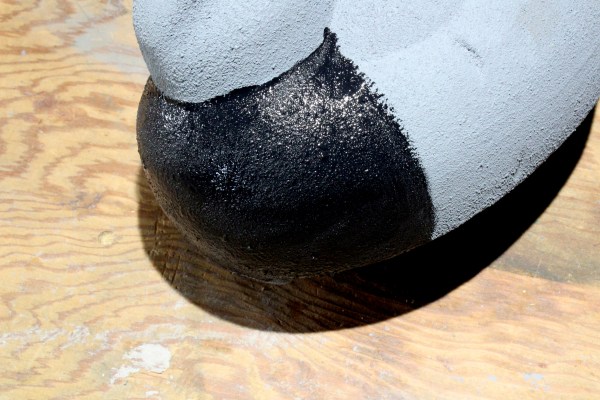
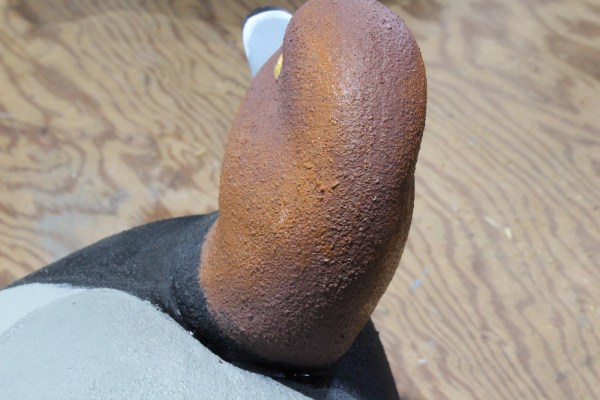
The Black on the aft end extends up the middle of the back and to the speculum on each side.
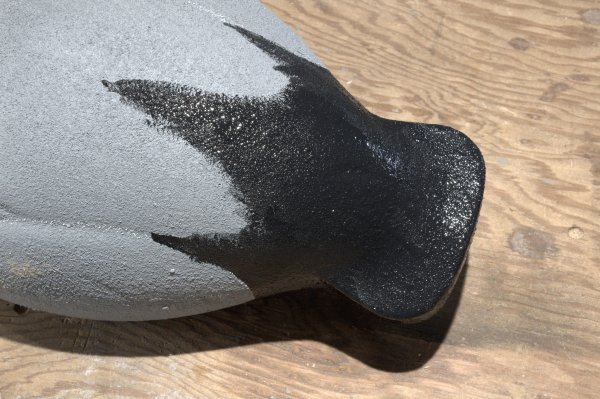
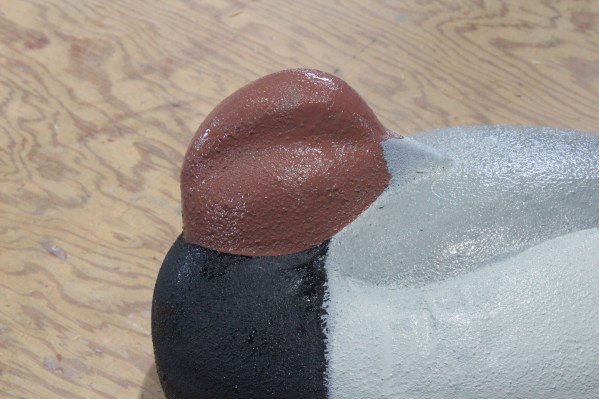
The Black extends halfway up the neck – wearing a turtleneck.
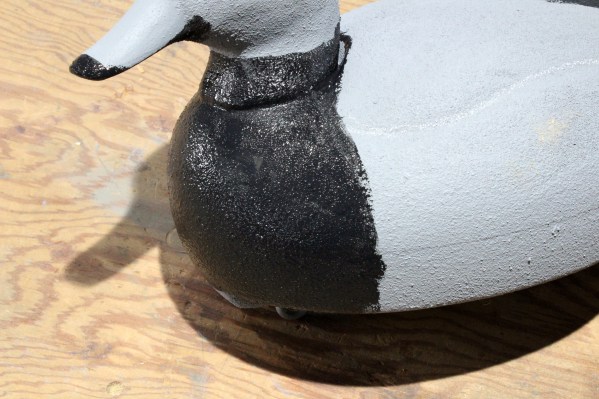
No neck shows on the Sleeper – so a crisp line between the head and chest are in order.
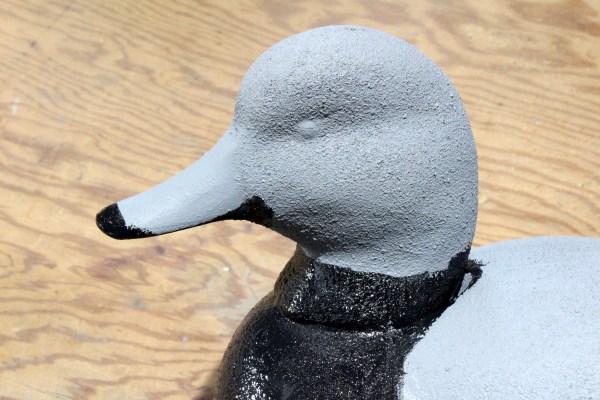
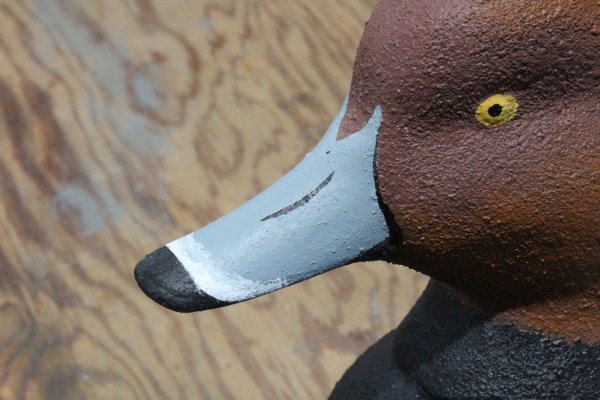
The Black covers the whole width of the bill tip – not just the nail – and also the bottom of the bill.
The back is a bit darker than the sides and grades from the paler Elephant Skin up forward to the darker Intellectual near the tertials. I apply the lighter color up forward while the Black is still wet.

The darker Intellectual is put onto the tertials.
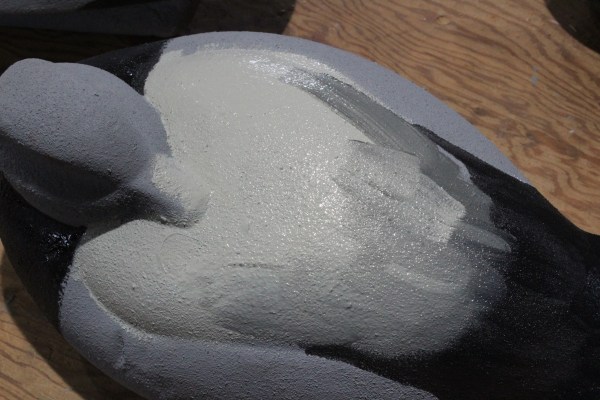
I work the paints fore and aft until I get a soft gradient from lighter to darker.
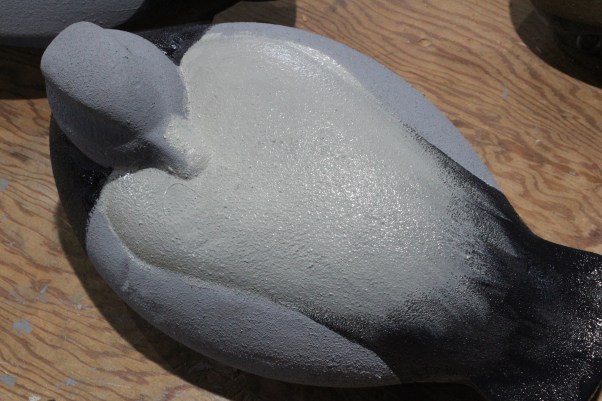
This bird’s “shoulder is just a shade too dark. I may stipple it with Elephant Skin when the paint is dry.
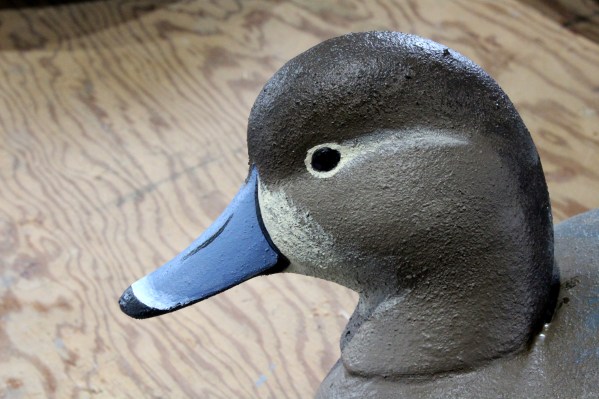
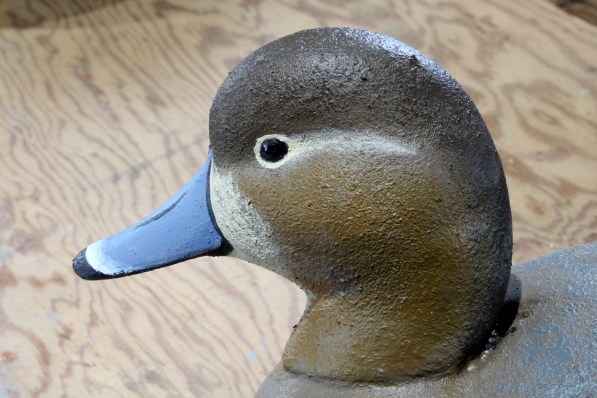
The entire head gets the rosy Oxblood base coat. The Redhead does not have the dark mask behind the bill like the Can does. I meet the Black turtleneck with a soft edge.
The Sleeper gets a crisp demarcation between the head and chest.
Behr’s Dark Storm Cloud has an older paint code format. I use it on several species: Broadbill (Bluebill), Wigeon, Pintail, Bluewing Teal, – Shoveler – but you could easily mix a medium blue-grey by adding a bit of Flat Black into Flat White.
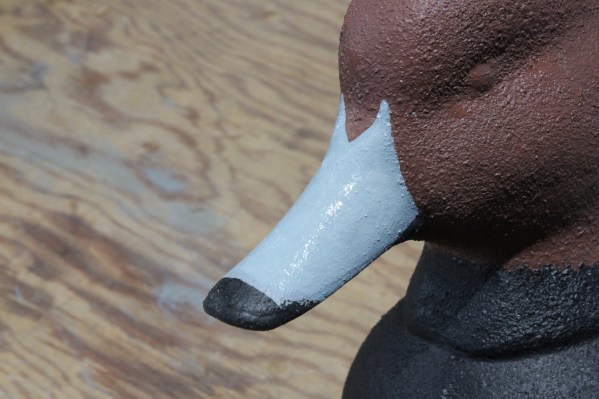
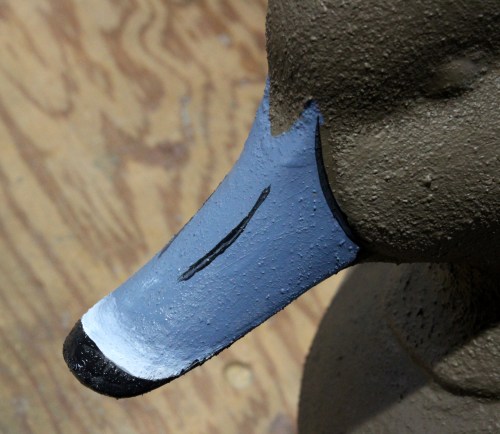
The White ring grades into the bill – so is best done when both paints are wet.

I use acrylic Cadmium Yellow from a tube for the iris. Note that the pupil is just slightly forward of center.
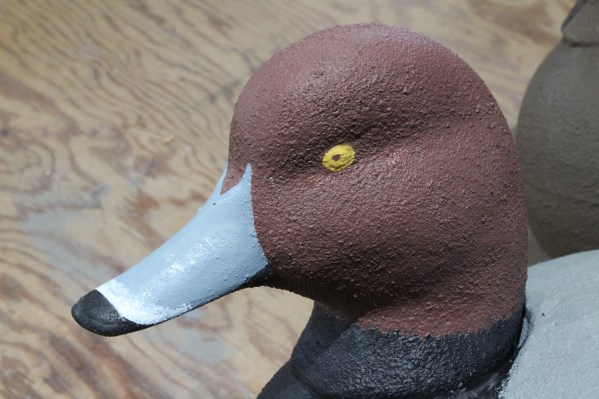
When the head paint is fully dry, I add the rusty Artisan highlights to the sides of the brow and the cheeks.
I keep the darker base coat showing on the top of the crown all the way down the neck.
The pupil gets its dot of Black. The aft edge of the bill get a line of demarcation.
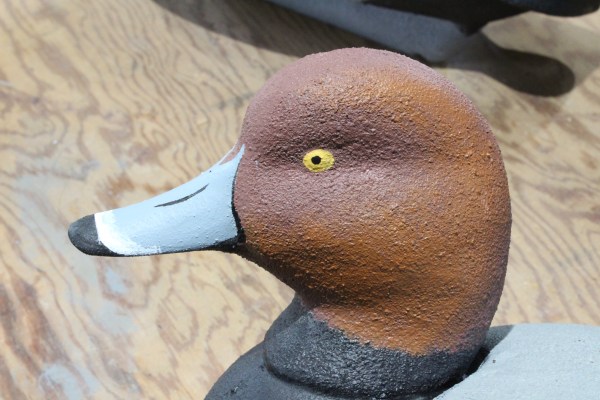
The Black lines start above the actual nostrils and run below them toward the bill tip. The next day – when the paint is fully cured – both the bill and the eye get a coat of varnish. This adds both a bit of true-to-life luster and some added protection for the paint.
Mister Redhead is now ready for his portrait on the bench.
…as is his sleepy rigmate….

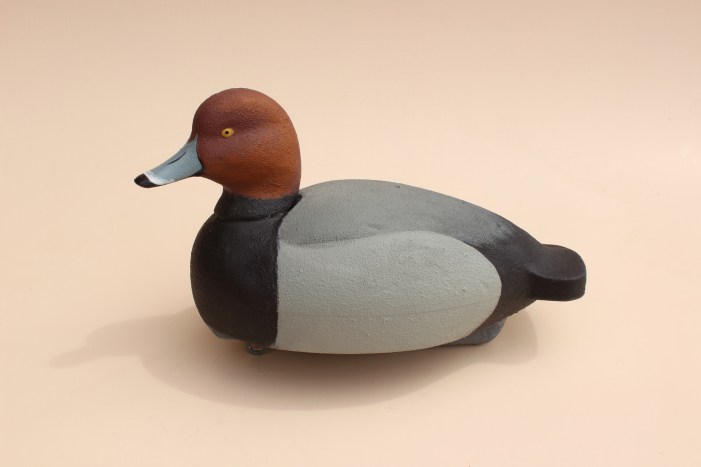
Painting the Hens
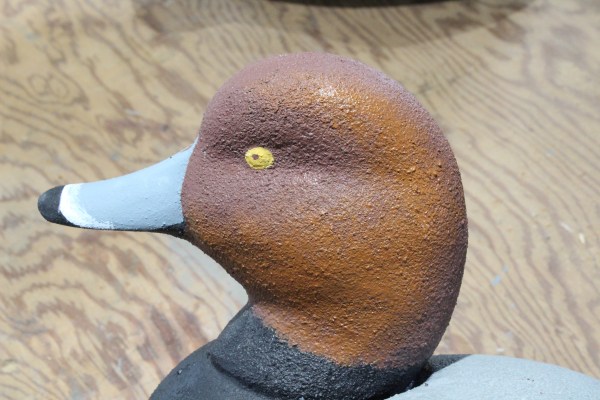
Here are the Behr colors I used for the Hens. It seems that the overall “cast” of the Hens varies in this species. I am not sure whether the cause is age or time of year or geography or just a natural range of hues. I painted this Hen with a slight reddish cast – but others – like my photos above – appear more greyish overall.
The chalk lines on the Hens are the same as on the Drakes. I will paint the grey speculums on the Hens.
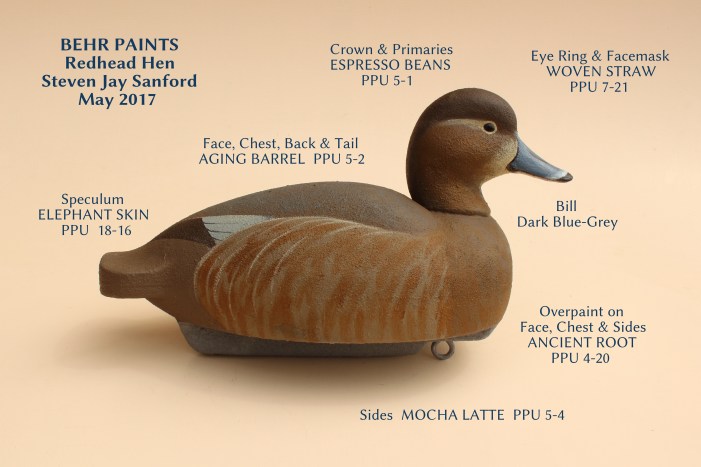
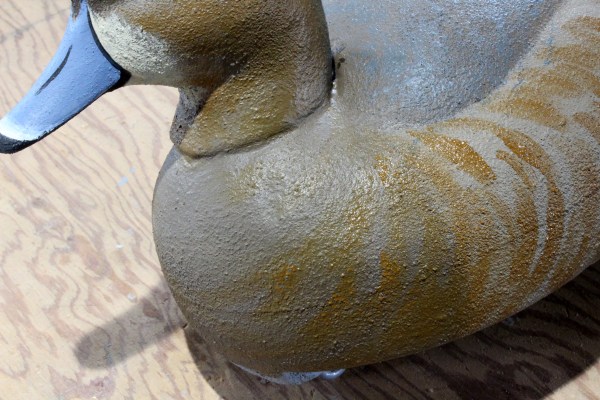
The head, chest, back and tail all get a medium brown. I use Aging Barrel on Canada Geese, Brant and numerous puddler Hens.
The sides are painted with Mocha Latte. I use this color for the faces on Black Ducks – and parts of several other species.

The bill on the Hens is a bit darker than on the Drakes. I added some bright blue to Intellectual – but again you could just mix some Flat Black into some Flat White.

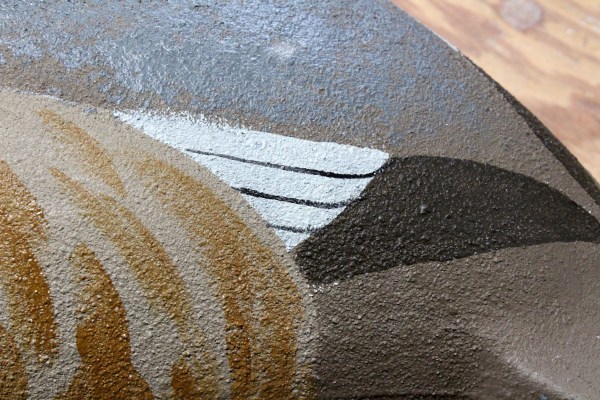
The tip of the bill gets the same treatment as on the Drake. The White “ring” is blended into the wet bill color. The Black tip – wider than just the nail – is added when the rest of the bill is dry – as are the bill-to-face margins and the nostril stripes.
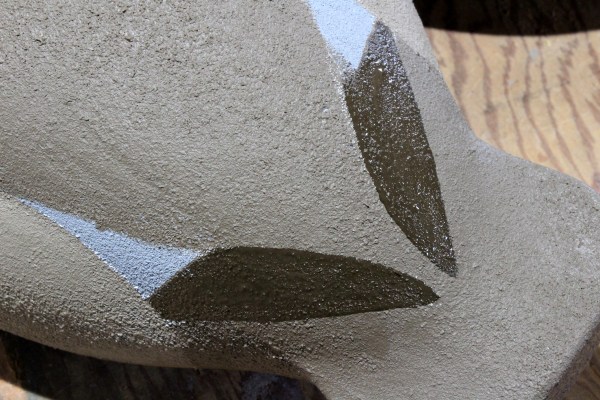
The primary groups are chalked flowing aft from the secondaries (= speculums).

I use a the dark brown Espresso Beans for the primaries to exaggerate the contrast with the rump.
I overpaint the brow and back of the neck with Espresso Beans, too.
The back is stippled with the medium grey Intellectual.
I fade the stippling onto the lower back.
The pale Woven Straw is used for the facemask. I paint a distinct ring around the Black eye but use a softe touch behind the bill and behind the eye.
I overpaint the cheeks with the reddish Ancient Root on a dry brush.
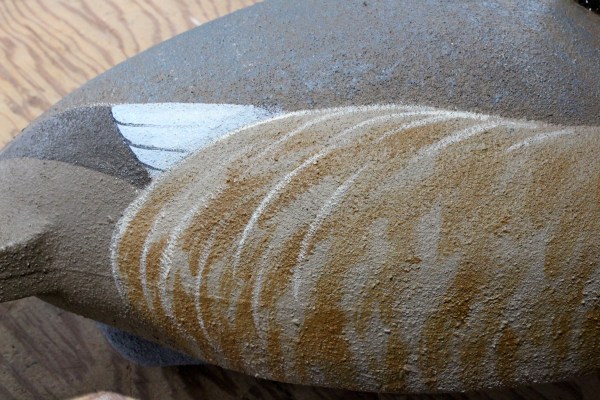
The sides are barred with the same color. The suggested lines should curve aft and downward – and leave plenty of base coat showing through.
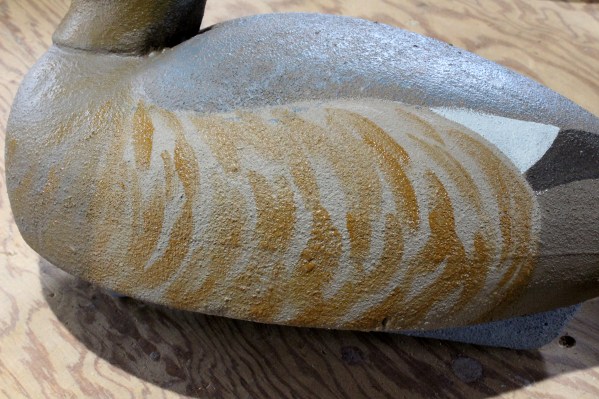
The reddish barring is carried forward onto the chest.
The speculum is painted with Elephant Skin. The fine Black edges are usually on just two (not the three I painted) showing secondaries.
Finally, I added a few paler edges to the side feathers – using Woven Straw – just o make them “pop” a bit.
Here is Madame Redhead sitting for her portrait.

Sea Trials
These Redheads first saw water on Lake Champlain, then the Hoosick River.


As always, I hope you find this information helpful!
SJS
![]()
