
A “bucket list” bird
I do not have a long gunning history with Eiders. Until just a few months ago, I have never owned or carved a decoy and had never pursued them with shotgun. I have read about them all my life and first saw them off Long Island during my college years – when I had a spotting scope and could see them off the South Shore, riding the swells in the Atlantic. I later saw big flocks off Montauk Point – and even saw a handful of King Eiders mixed in. Nevertheless, the species has always caught my fancy. I enjoyed the stories of gunning them along the coast of Maine – the wild romance of heavy seas and rocky islets was undeniably appealing. The great Swedish painter Bruno Liljefors fueled the fires with his powerful renderings of these powerful birds.
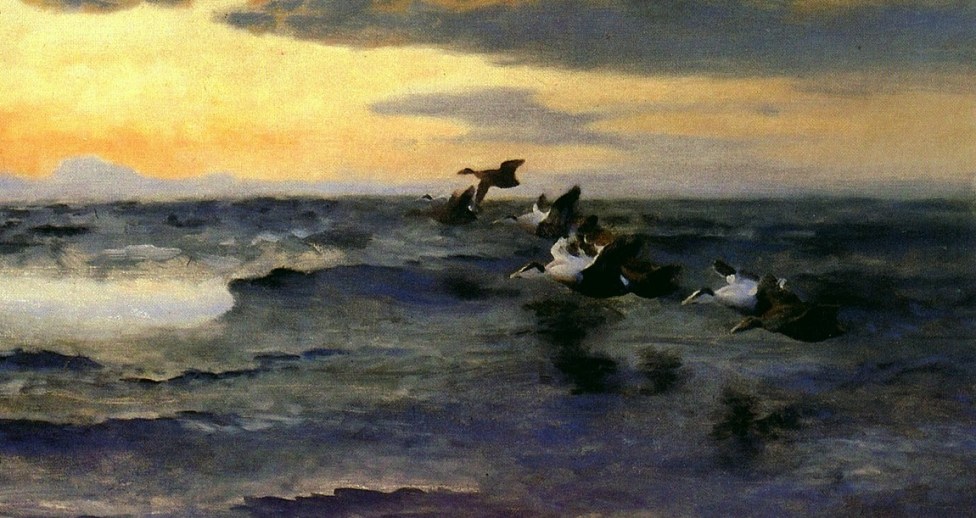
Inset from Eiders at Sunrise by Bruno Liljefors 1928
So – to celebrate my 50th year of gunning – a good friend and I drove over to Saco Bay in the Pine Tree State and hired the services of Troy Fields ( www.traditionsguideservice.com ). The trip was not about shooting a Common Eider for my “life list”. Rather, I wanted the experience of seeing these magnificent birds in the setting I had always read about. It would be easy enough to pot one off Long Island, but I wanted to be in the “right” place – with the seas and islands and lighthouses and lobster boats. The 2-day hunt could not have been more satisfying. As I sit here more than 2 years later, I can easily recall the drama of all of the sea birds within that wonderful seascape. And, the birds-in-hand were breathtaking.

The peach-colored blush on the chest is fabulous – as are those long processes either side of the drake’s Roman nose.
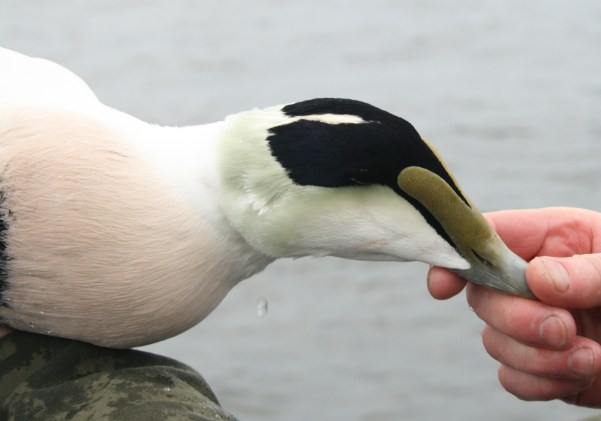
The black crown is a deep inky blue on close inspection.

The plumage on the hens is no less remarkable. Replicating the many rich hues accurately would require lots of time with the Umbers and Sienas and Ochers in the paint kit.

Some Eider Decoys
The year 2016 finally brought some Eider stool into my shop. Another friend wanted help painting the heads on some silhouettes he was making as a gift for another Eider guide. We re-painted a nice big plywood silhouette – and replicated the existing, elegantly simple paint pattern on the body.

We spent a bit more effort on the head and bill. As you will see, the lower bill itself is almost always Blue-Grey but the upper lobes vary from a deep Ochre to a pale Olive. Here we used the same paint that I use on Drake Black Duck bills: Behr Curry Powder.

The next Eider Attack has just begun. Long Island gunning partner Craig Kessler wanted to flesh out his sea duck rig. We added 18 Homer Oldsquaw ( http://www.homerdecoys.com/ ) and had them ready-to-hunt last fall (see the TUTORIAL for painting them elsewhere on this site). We added a dozen Homer Eiders, too – but they sat on the back burner – actually, in their mailing cartons – until recently. Thus far, I have completed a pair so that I could work out the paints and the painting processes for the Drake and Hen.
Preparation

As I have been doing in recent years with all of my foam decoys, I coated these with epoxy + sawdust. I do this to toughen the skin and to reduce the shine on the finish paint. And, it is much less work and added-weight than the very durable burlap + tile mastic combination. I have been experimenting with crushed walnut shells and ground corncobs but keep coming back to the fine sawdust from my bandsaw. I coat the bird (bodies and heads done separately) with epoxy resin (U. S. Composites 635 Thin Resin with Medium Hardener – http://www.uscomposites.com/epoxy_resin_hardener.htm) and then sprinkle the wet epoxy with sawdust. I hang them tails down to cure. The hard plastic (polypropylene, I think) heads are scuff-sanded with 60-grit then wiped with lacquer thinner. I try to avoid the bills and eyes with the epoxy.
After the epoxy cures, I coat every surface with a latex Grey Primer. It is important to fill most of the voids among the sawdust particles so that the surface is not too rough. Such surfaces look great – until they get fine mud on them and can be impossible to scrub clean.
Drakes
The masters for these gorgeous Eiders were carved by Bob Mitchell of Asheville, NC. He made it very easy to establish paint patterns by carving in all of the major body contours.
Here are the Behr latex paints I use – mostly in 8-ounce sample-size jars – for the Drake. You can easily mix the Blue-Grey bill color simply by adding a bit of Flat Black to some Flat White. Also, the green wash on the cheeks on this bird is a bit too bright and too yellowish. The Green Energy listed here is a better choice, more of a medium green. Finally, note that I give two choices for the lobes on the bill. I use the Curry Powder for Drake Black Duck bills and the Gingko Tree for Hen Black Duck bills.
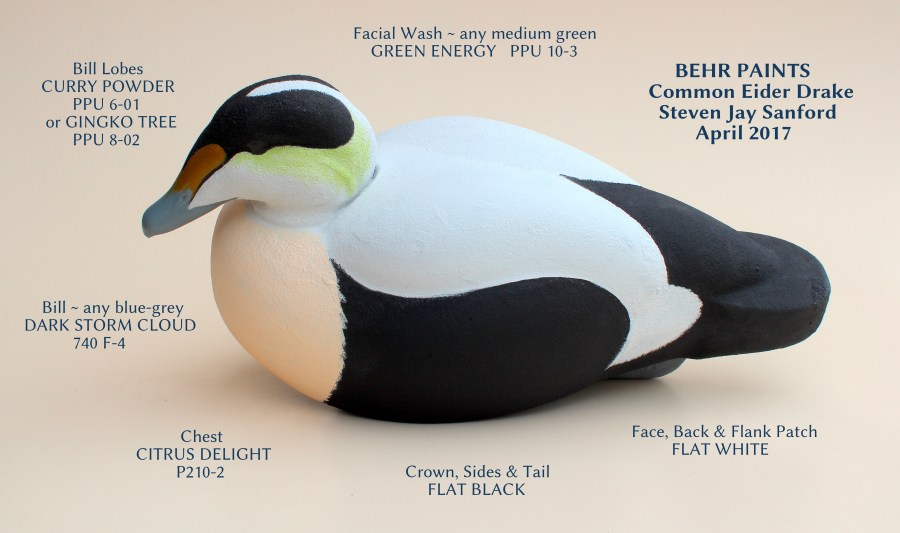
Here is the layout of the Black cap on the crown and alongside the bill:


Here is the Curry Powder on the bill lobes – it should actually extend a bit lower on the bill, through the nostrils.

Here is the Gingko Tree on the bill lobes – closer to the birds we shot in Maine.

I worked a bit of Green on my brush into the wet White paint on the cheeks.


Here is the completed Drake. Note how the line between the Citrus Delight chest and the Black sides – although curved – is more or less vertical down from the “shoulder”. Also note the shape and location of the White flank patch.

Here is another view – rolled a bit so you can see the back a bit better.

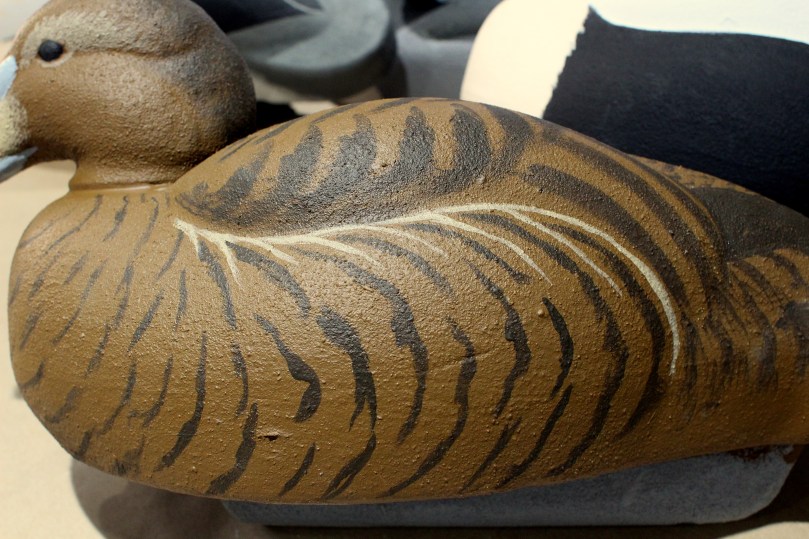
Hens
Here are the Behr paint colors for the Hen. Although Hens vary a lot, I like the warm reddish cast and so base-coated the whole bird – except the bill and eyes – with Ancient Root.

Everything but the bill gets a coat of Ancient Root.

The bill is a bit darker on the Hen than the Drake. This should probably be a shade or two darker. The eye is painted Black and – along with the bill – will later get a coat of varnish for both luster and protection.

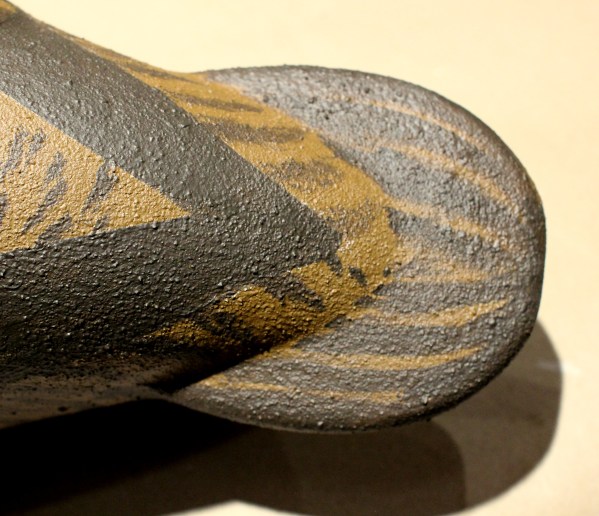
The dark – Espresso Beans – markings cover most of the tail feathers so that the tail looks darker than the rest of the body.
The primary groups are solid but the rump gets lighter markings than the tail itself.

Like the rump, the flanks get light barring.

The curved tertial group gets 4 edgings that follow the downward sweep.

The back gets larger bars, starting with 6 or 7 heavy markings along the lower sides – the scapulars.

The markings get a bit smaller. The middle rank is about 5 bars and the mid-back/cape has just a few smaller ones.

The top and back of the head get darkened with a dryish brush.


The barring along the sides and chest are longer aft and shorter and sparser forward.

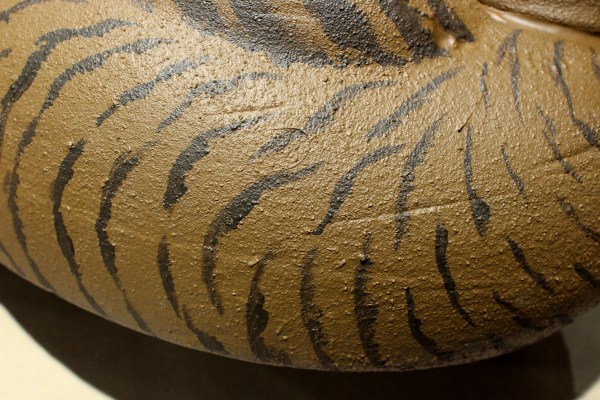

The upper edges of the side feathers get highlighted with Collectible.


Behind the bill and above the eye also get lighter patches. Note that there is not a Black nail on the bill as on many other ducks.

Here she is all done.

And rolled a bit for a different view.

Sea Trials
I did not have the opportunity to test these in North Atlantic swells.


Hope this is helpful!
SJS
![]()
