
The South Bay Duckboat – another Long Island native


In 2015 and again in 2016, I did lots of custom work on a South Bay Duckboat. Bill Abbate brought me his boat in very good condition but wanted numerous upgrades and new features. In addition to new floorboards and the usual motor board, I raised his spray shield, made new flap boards, added some thatch rails and deck hardware, and sewed some custom canvas work.
The full story is on duckboats.net at:
– and the images will be available until Photobucket sweeps them away sometime in the near future ( a long, sad story…).
Origins
The South Bay Duckboat was the brainchild of John “Red” Magnus and Ray Miluk. They built them in West Sayville – several miles east of where I grew up – beginning in the 1980s. I wish I knew more of the history. I used to enjoy seeing Red at the various shows on Long Island. He now lives in western New York and I hope he is doing well. And, I hope he would approve of my attempts at getting his boats back in shape, ready-to-hunt.


The 2017 Project
Late summer this year, Greg Nalbone brought me his “barn find”. Greg and his gunning partner had watched this abandoned vessel on their way to hunting deer and turkeys in the Catskills for many years. Two years ago, Greg acquired it and hauled it back to Long Island. I met Greg at the South Shore Waterfowler Association’s Duckboat Show & Waterfowl Festival at Cedar Beach in 2016.

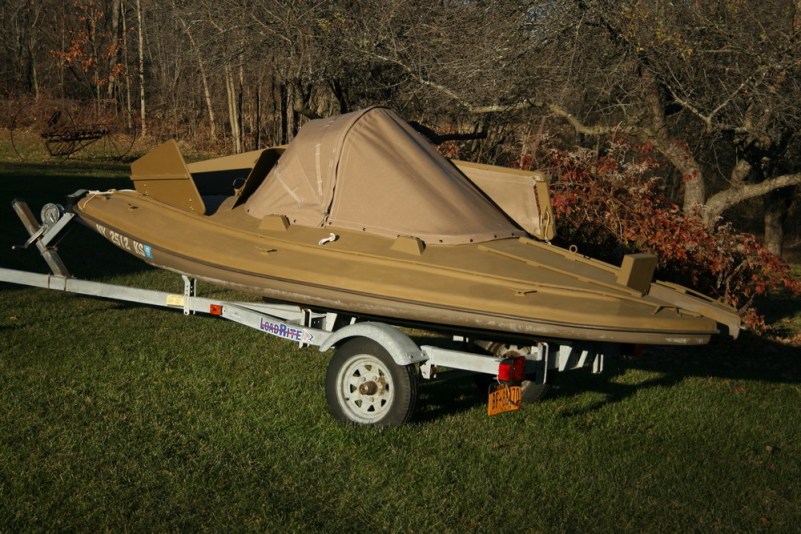
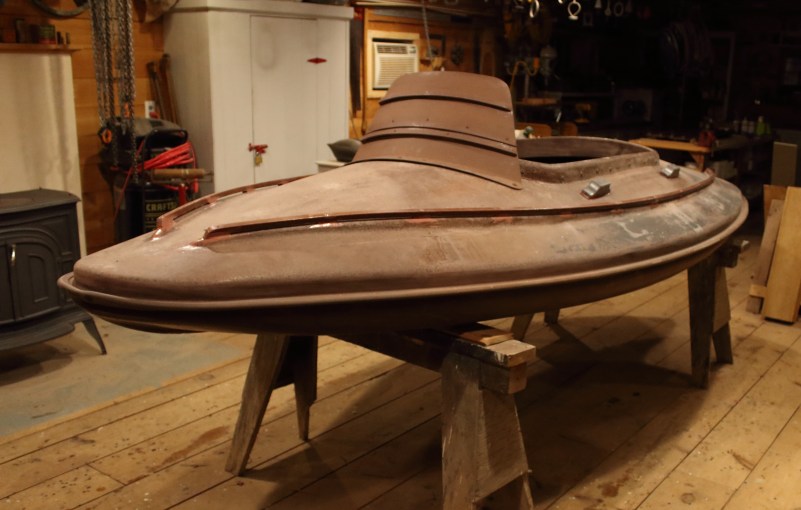
As she arrived – in factory Marsh Brown
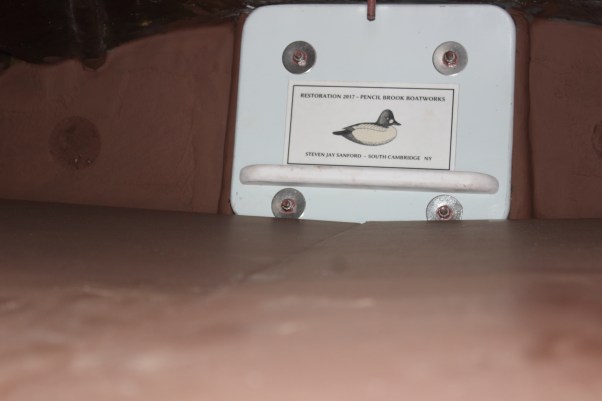
Intake at PENCIL BROOK BOATWORKS
The “bones” of this vessel were sound. The floor reinforcements were intact and only some “fracturing” on the deck was cause for concern. Because the boat sat outside for many years – not actually in a barn – the wooden parts all needed replacing. The motor board and thatch rails were crumbling. The floorboards were warped and perforated and were not worth salvaging. The flap boards showed signs of hard use – and the deck blocks had some rot in them. The only hardware was a pad eye on the underside of the bow – but nothing on deck. The spray shield was fine – as was the cockpit cover. Greg hauled it to Pencil Brook Farm on a brand new Load-Rite trailer – a perfect match for this boat.
The Hull
I will tell the story of my work “system-by-system” – rather than in a straight timeline. I tend to jump around from task to task – seldom working in a linear fashion, but always getting closer to the goal line. The first “system” is the hull itself. The fractures to the deck were my biggest concern. The bottom was in remarkably good condition and needed only some minor re-surfacing.
The fractures looked like more than just gelcoat damage so I conducted exploratory surgery with my grinder – and 40-grit discs. Some problem areas were worse than others. I ground down to sound ‘glass in each location. Only one showed daylight through the wound.
Each wound was dressed with ‘glass and epoxy resin. As I have in recent years, I got my materials from U. S. Composites in Florida. I used their DBM 1708 Biaxial – double-biased 17-ounce cloth stitched together with 3/4-ounce mat. http://www.uscomposites.com/specialty.html

Each patch was thoroughly saturated with epoxy. It was then covered with Peel-Ply – a Dacron cloth that does not stick to epoxy. It allows me to smooth the job before it cures – and so saves lots of sanding later on.


After grinding off the cured patches, I filled each with a mixture of epoxy + fairing compound (U S Composites’ mix of phenolic microballoons and colloidal silica). After that cured and was sanded down, everything got a coat of resin with a bit of graphite in it.


One final sanding, then ready for paint:


The interior of the hull also got a light sanding – and a thorough wash with acetone. The windows and doors were wide open on the shop for the latter task.


Towing Hardware
The factory boat had a nice bronze pad eye beneath the bow for towing – either on the water or on a trailer. Although it could take a small snap hook, it was not large enough to take the typical hook on a trailer’s winch. Also, I like to back up such hardware with something fairly substantial.

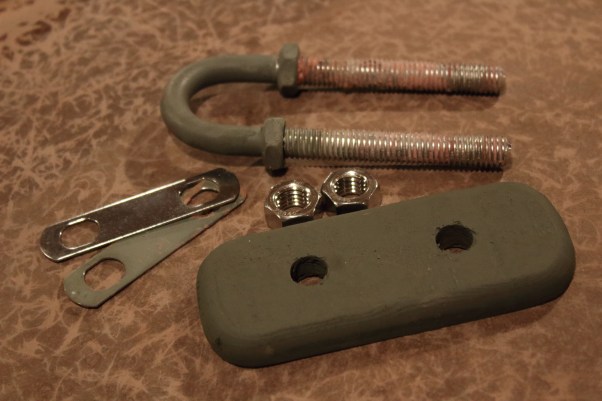
The owner and I discussed simply adding the traditional large ring – but later opted for a big stainless steel U-bolt. When hauling a trailer on icy and slimy boat ramps, I prefer to have one hand on the winch post and the other free to do the job. Snapping a hook over a flopping ring usually requires two hands. The rigid U-bolt should be easier – and so safer – to use. Of course, most modern vessels have such U-bolts/bow eyes on their hulls.
This U-bolt has its own “washer plates” inside and out. But, I added a larger plywood backer for the inside. It is 1/2-inch AC plywood sealed with epoxy. Corners are rounded so it seats evenly against the hull.
The first job was to remove most of the existing foam from the bow chamber. Here are my “foam removal tools”.
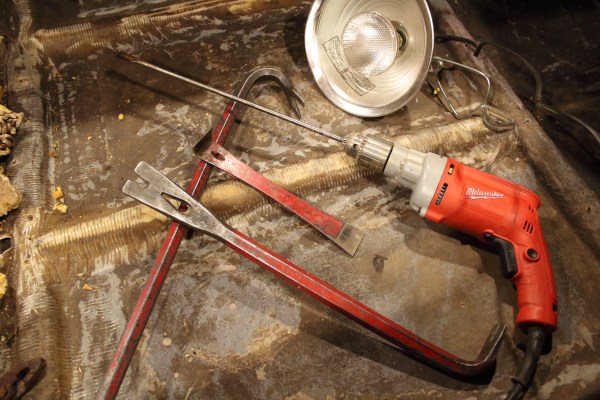
This looks like spray foam from a can. I am guessing it is not the original factory-installed foam. Actually, a lot of it sort of looks like brain matter….

More evidence that suggests the foam was not original…..

Lots of 3M 5200 was used to coat the threads and bed the backers.
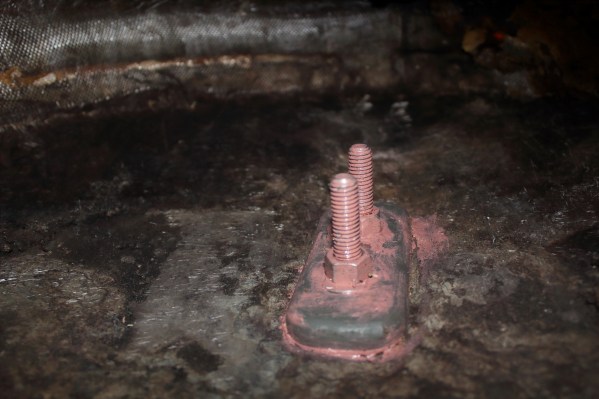
A cleaner finish on the exterior.

Ready to haul!

Thatch Rails & Deck Hardware
The factory thatch rails were made of White Oak and used nylon spacers. The weather took its toll on the White Oak – and the old rails made for nice kindling in the shop stove.
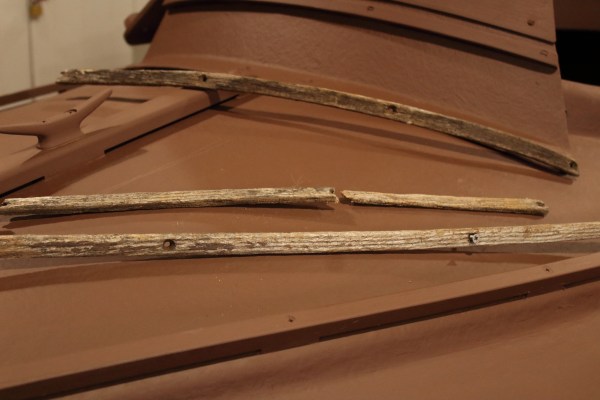
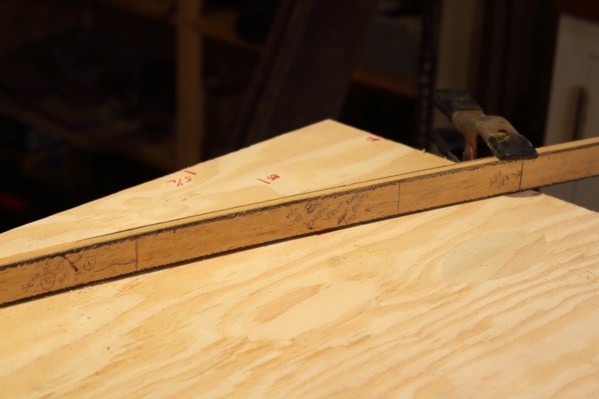
When I began the layout for the new rails, I soon discovered that the existing holes were not evenly spaced. Yikes! My OCD certainly could not allow for such chaos. And, I realized it would be very difficult to accurately locate each of the existing screw holes on a piece that bends so much. I could have temporarily tacked each new rail to the hull and marked each hole – but opted for Plan B instead.
Plan B ~ I ground then filled all of the existing screw holes – except for the forward-most – which I saved as a reference. I backed up each fill inside with some heavy duct tape. The filler was epoxy thickened with fairing compound.

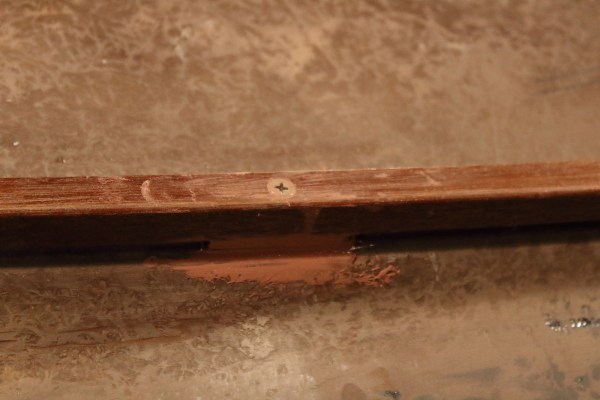
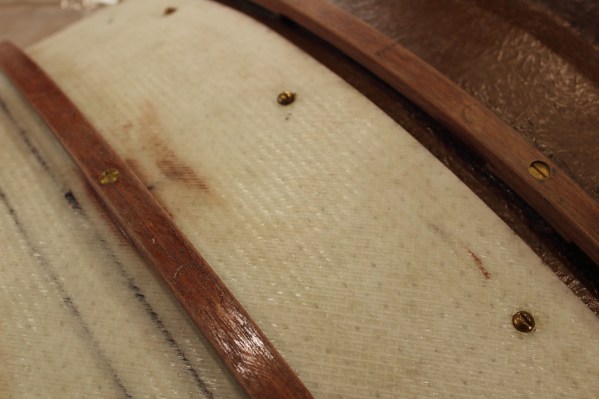
I then laid out the spacers. Each was 2 inches long and 3/16-inch thick. Experience has shown me that 3/16-inch is the optimal thickness for Salt Hay (Spartina patens) – the “thatch” we use on Great South Bay. I used Philippine Mahogany instead of White Oak because I find it easier to seal and keep paint on it. Both are strong and stiff enough and both have natural rot resistance.
![]()
The rails were set back-to-back so that all spacers could be clamped at the same time. Gorilla Glue (polyurethane) was the adhesive of choice. Most important, each spacer was exactly (+ or – 1/16-inch) equidistant from its neighbor.

The edges were rounded over and the ends were faired off to prevent catching on lines or clothing. Each screw hole was drilled and countersunk for 10-24 flathead s/s machine screws. The rails were then sealed with thinned spar varnish.

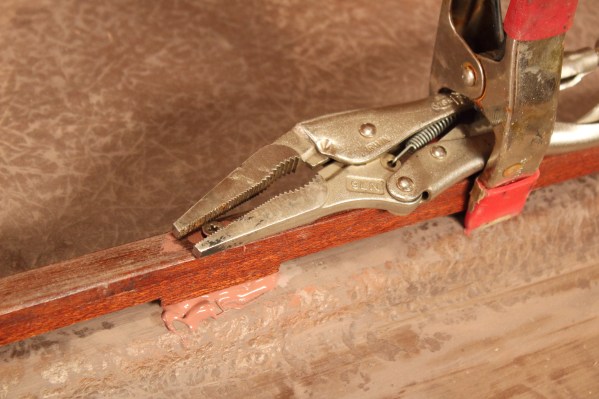
I had hoped to have a helper for fastening the forward ends of each rail – but my “assistant” (wife Susan) was late getting home. So, some creative uses of Vise-Grips, spring clamps, ratchet straps and rope provided the needed “second set of hands”.
Everything was set in 3M 5200. Nylon-lined lock nuts and over-sized washers were used below.
I sized the rails 3/4-inch wide by 3/4-inch tall so that they would bend readily in both planes. I began fastening up forward and worked aft. Everything bent into place easily. No cracking sounds – and so no frayed nerves. The aft ends land over the rear flotation chambers. So, I fastened them with wood screws – rather than make a major job of excavating the foam to back them up. The 5200 alone will likely do the job there.
New rails were added to the foredeck and the stern deck. Although they used the same 3/16-inch spacing for the Salt Hay, they were made wider to support some deck hardware. Each rail and each fastener was bedded in 5200 – and all fasteners got s/s fender washers below.

Spray Shield Extension
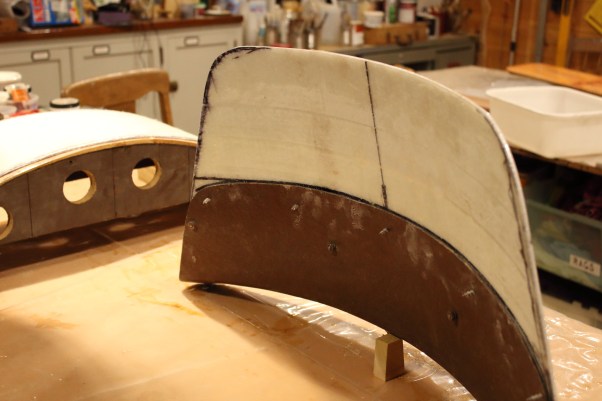
As I had done with the earlier South Bay, I extended the existing spray spray shield so that it was taller. I had made a bending jig for the earlier project – and had it stored up in the loft. I use the jig to mold the ‘glass lamination to the correct curve – and also to glue up the laminated Mahogany thatch rails that fasten to the shield.
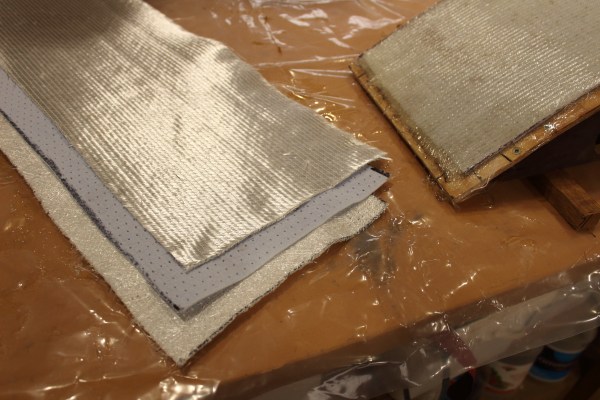
I tried a new product for the ‘glass layup. In addition to an inner and outer skins of the 1708 biaxial (that I used to patch the deck), I sandwiched in a layer of 2 mm Core Mat. It is intended to add bulk and stiffness without much weight. All of these materials are compatible with either polyester or epoxy resins. I would have used the less-expensive polyester but it was too cold outside. I did not want the polyester resin “aroma” permeating my shop – probably forever – so I used the epoxy instead. The wood stove ensures thorough cures throughout the winter.
I cover the jig with cellophane mailing tape. After an overnight cure, the new “shield” pops right off. I trim the top and bottom edges on the table saw.

I match the new dimensions and angles to the existing shield. I screwed it temporarily to the existing shield.

The sides and rounded corners are cut on the band saw. All new edges are sanded then sealed with epoxy.
The old thatch rail needed to be made anew – and another was made for the upper extension. Both were clamped onto the jig and glued up with epoxy. The 3/16″-thick spacer blocks were later glued and clamped with “Gorilla Glue” ( a polyurethane ).
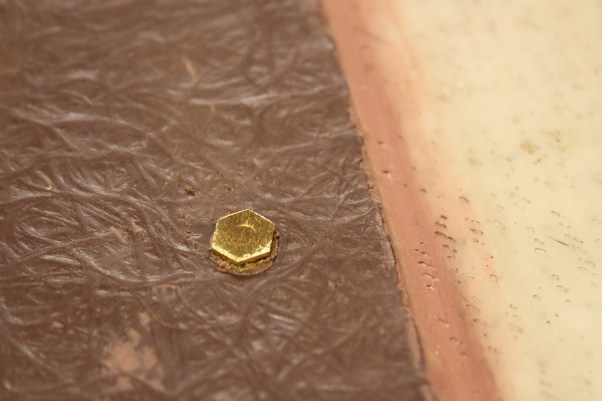
All hardware is brass machine screws. Round heads secure the 2 shields together; flat heads (countersunk) hold the thatch rails onto the shield.
All pieces are set in3M 5200. I used their Mahogany-colored product on this boat. It’s a bit more expensive than White or Black – but covers more easily with paint.
All exposed threads are ground flat. It is important to use a sanding disk – and NOT an abrasive wheel – for non-ferrous metals like brass. The soft brass can clog grinding wheels, causing them to overheat and even fly apart.

Fewer scars on hands and clothing once the hardware is smoothed down.


After exhaustive wind tunnel testing and engineering analysis of the taller spray shield….I decided to back up the fasteners with 1-inch s/s fender washers. All my hardware uses nylon-insert lock washers – so vibration will not loosen things up. A dab or two of 5200 on the threads doesn’t hurt, either.

Here she is with the final paint.

Flap Boards
Most South Bays that I have seen use flap boards of one description or another. I am guessing these are factory-original. They were 5-1/2 inches tall and had a single thatch rail. I made new boards that were 8 inches tall and had two thatch rails. The second rail helps to keep the Salt Hay headed they way you want it.

I used 1/2-inch AC plywood for the boards. I filled the imperfections on the C side and coated everything with epoxy – twice!

The mounting blocks were sawn from 2-inch Mahogany and made longer and beefier than the originals.

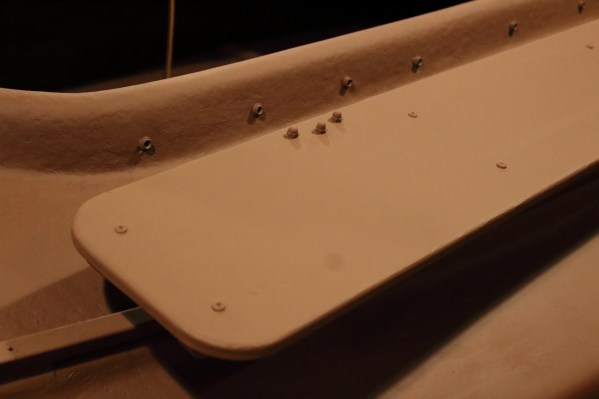
The framing below decks had been applied somewhat asymmetrically. So, I could not space the fastener holes symmetrically – as I would normally do. Instead, I located places where I could use a 1/4-20 s/s lag screw and not land on framing. I had to mark the location of each lag for each of the blocks. As a result, the blocks are located on-the-money symmetrically on the decks – but are fastened from below. I had to use both long and short lags on each block. And – of course – each block was bedded in 5200 and backed with a fender washer.
I fastened the s/s hinges dry – just in case the owner wanted to remove the flap boards for maintenance or storage. On the blocks, I used the 3/4-inch screws that came with the hinges in the 2 outer holes. I used a 1-1/2-inch screw, though, in the center hole for greater holding power.

Everything got sprayed with Rustoleum Self-etching Primer – and then the duckboat paint (via brush).

The board half of each hinge was fastened with s/s machine screws and acorn nuts – the latter to prevent chafe and fouling.
I used these rubber grommets as bumpers – to protect both the coamings and the cockpit hatch – as well as the boards themselves – when the boards are raised in gunning position. Only one was needed on each board.
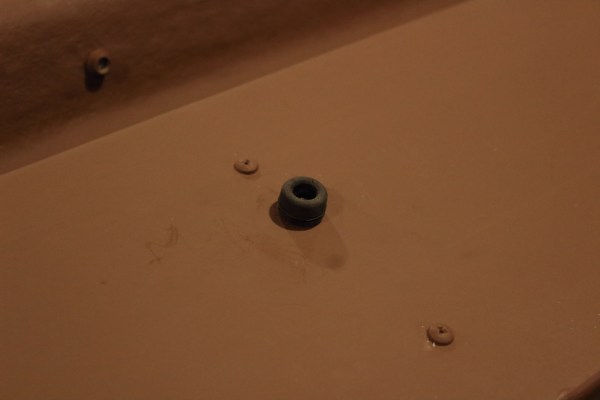
A pair of nylon strap eyes and a “bungee” cord keep the flap boards up when in transit on the trailer. I could watch both the boards and the cockpit hatch as I drove the 230 (mostly highway) miles to Long Island – and nothing moved a bit.

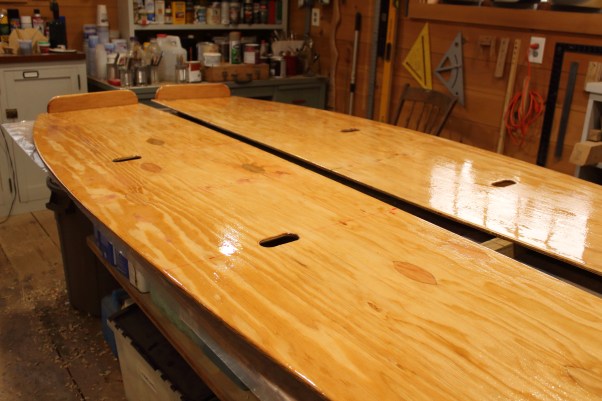
Floorboards
The existing floor boards were in fairly rough shape – not worth salvaging in light of the modest cost of one sheet of 3/8-inch AC plywood.

I used the existing floorboards as a starting point – but worked toward my usual floorboard approach: fair curves to please the boatbuilder’s eye – and wooden turnbuttons to hold them in place.
I first laid out the half-breadths – then used a batten to smooth out any lumps or bumps in the sweeping curve.

The radius of the curve got tighter forward.
A single fair line is marked for cutting – with both halves to be cut at the same time. By the way: I made these ‘boards as long as possible. An 8-foot length cannot get in or out of the cockpit. Eighty-four inches is the maximum length.

A circular saw – set fairly shallow – is a good tool to cut such long, gentle curves.

Oblong ports for the 4 turnbuttons were cut while the 2 boards were still stacked and clamped. Their edges were rounded over with a router later on.

I fastened “curbs” at the forward end – so loose gear beneath the foredeck would not work its way aft when bouncing across the Bay.

Two coats of epoxy sealed the raw wood.
Additional wooden cleats were needed below to support the floorboards against the hull.

Two coats of topcoat paint – Lou Tisch’s FME (Flat Marine Enamel) – were put on the completed ‘boards.

The bases for the turnbuttons were precisely located on the hull framing. The framing was not perfectly symmetrical – so some modifications were needed. The bases were epoxied to the framing – but 3M 5200 might be a better choice – given the flexing in the hull and boards.
The turnbuttons are Mahogany. They are rounded over to avoid tripping et cetera. They are held with a s/s wood screw – and a s/s fender washer in between the turnbutton and the base.

Motor Board
This nice old Evinrude 15-horse 2-stroke will push this South Bay – once the motor board has been replaced. Owner Greg Nalbone cleaned and painted it.

The factory motor boards were 2 pieces of 3/4-inch plywood encased in ‘glass. I have made new motor boards for several South Bays over the years.


After ripping off all of the wood without tools, I Sawzalled off what was left of the rusted (originally galvanized) carriage bolts and punched them through with a 3-pound sledge. The 5 holes were filled and ground flush inside and out. The other 4 holes are for the new board.

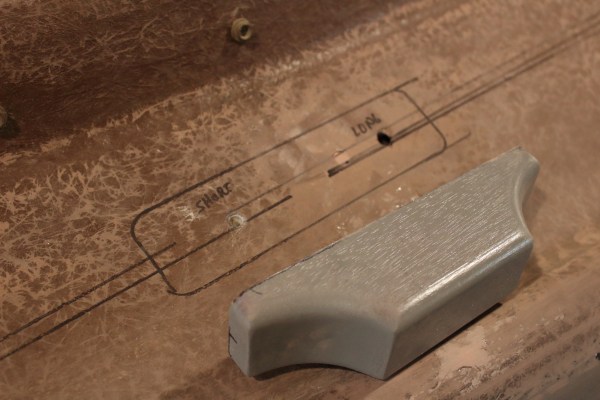
I prefer motor boards with less surface area up against the hull – where they invite trapped moisture. So, mine are held off with spacers. I round (in plan view) and round over the bottom edge to serve as a lifting handle when the motor is elsewhere. I used some old (and thus very dry) treated 2×10 lumber (Southern Yellow Pine treated with CCA) that I’ve kept around in the shop for decades – for such a purpose


The new motor board is bored and countersunk for 4 s/s 5/16″ carriage bolts. The shallow “sockets” on the board receive the clamp pads of this particular Evinrude – so it won’t twist off in a turn.

It is sealed with 3 coats of epoxy – and at least 2 coats of paint – before installation.

The backer board is half-inch AC plywood sealed with epoxy. I over-bore the 4 bolt holes to 3/8-inch to make installation a bit easier. That extra piece projecting inward is PVC lumber – to serve as a bumper, protecting the gas tank from the bolt ends.
Each bolt was carefully coated (slathered?) with 5200 before insertion – and a layer was spread on the mating surfaces of the board before the bolts were drawn up.

Large s/s fender washers help spread the load.
Cockpit Hatch
The factory cockpit hatch was in fine shape. It needed a bit of cleaning – a light sanding followed by an acetone wash – and fresh paint inside and out. I was able to find a nice brown edging from an RV supplier out in Indiana.
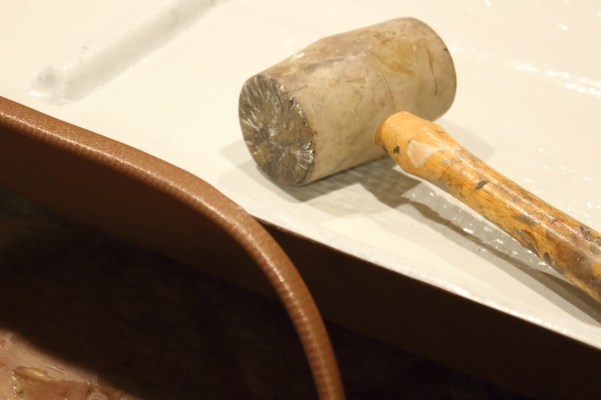
I installed it without any adhesive. It was a nice tight fit that required the assistance of The Persuader….
I did not have any rivets in the shop, so I used some small brass machine screws to secure the ends – with the brass ground down once again.

The flap boards held up by the bungee cord keep the hatch in place – even over 200 miles at highway speeds.
![]()
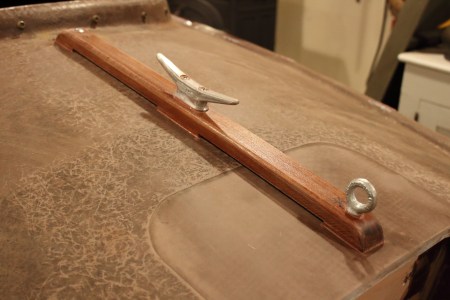
Every Gunning Boat Needs a Hood Ornament
As my regular readers know, I am always looking for an opportunity to build a duck into my work. This sleeping Black Duck wanted to loaf on the forward thatch rail of this South Bay.

This scrap of Mahogany was nothing special – but was just the right size.

It got 4 coats of spar varnish before installation. It is bedded in 3M 5200. The forward end is fastened from below – through the deck and thatch rail – with a long s/s 1/4-20 lag and fender washer. The aft end is screwed through just the thatch rail with a wood screw. The bow painter will be fastened to the eye bolt.
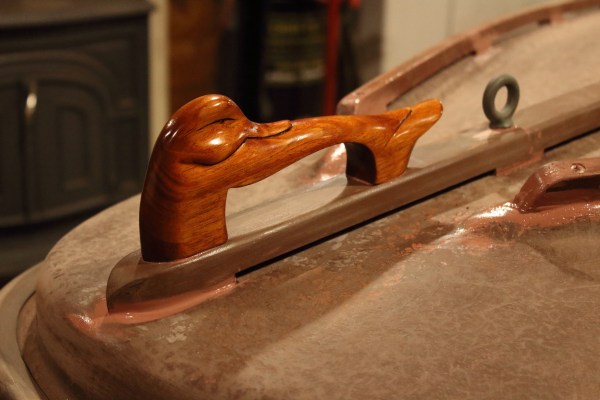
I like the Black Duck I put on my own sneakbox RED~LEG – but I tweaked this one just a bit to perfect it.

Here it is with the paint on the boat. It should still get a couple of coats of a good marine varnish with plenty of UV additives.
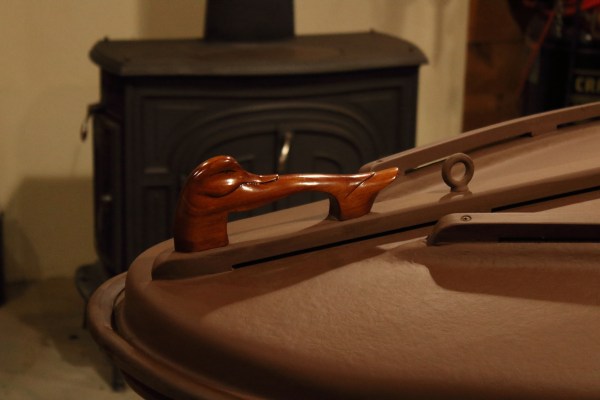
Here it is ready to lead the way back home.

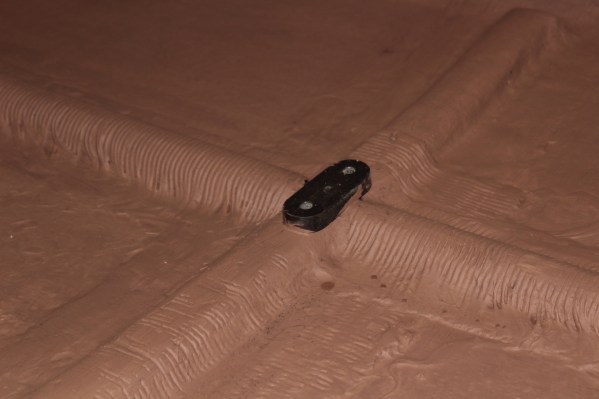
Safety Last – New Flotation Foam
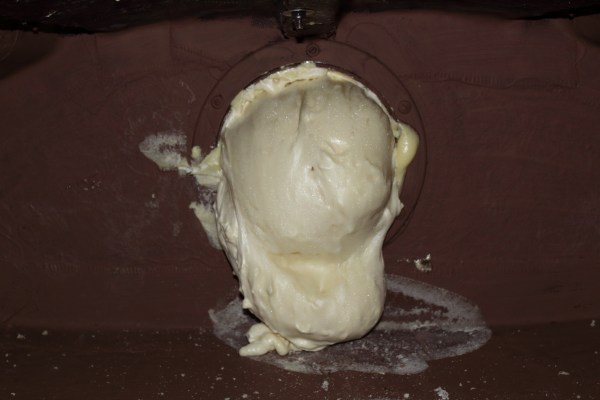
The last job – of the entire restoration – was adding flotation foam to the bow chamber. I had removed the existing foam so that I could back up hardware installed from the foredeck and beneath the bow. It was too cold to pour outside. So, instead of hanging the boat truly vertical for an easy pour, I did the next best thing and raised the stern up to my ceiling and put the bow on the floor. This gave about a 45-degree slope. Better than nothing – but with challenges of its own.

I went spelunking downward into the bow for each of the 4 “lifts”. Flotation foam should be poured so that it cannot overwhelm the space as it expands. Several smaller pours allow it to expand and conform with only the final pour squeezing out through the opening. For the first pour – in the interest of protecting the fresh new interior paint – I covered the “floor” with plastic. When I crawled down inside to pour the first batch, however, I soon discovered that I was in a frictionless environment. For you Seinfeld fans – imagine me scrambling out of there like a Ring-tailed Lemur….
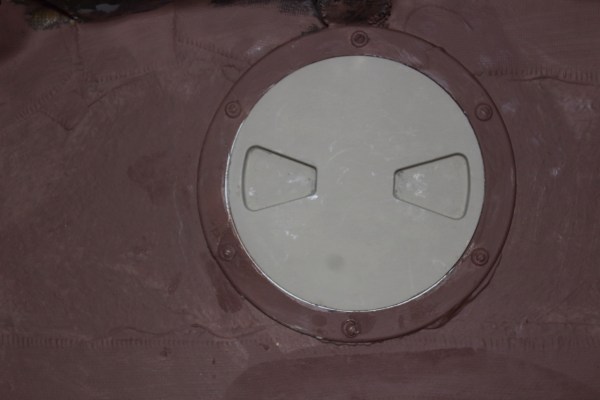
Finally, I cleaned up and re-painted the 6-inch Beckson inspection/deck plate. I scraped out the old and new foam from the threads on the frame and lubricated the deck plate threads with lanolin.
Ready-to-hunt
To match the factory Marsh Brown, I got a gallon of FME (Flat Marine Enamel) from Lou Tisch at Lock, Stock & Barrell. The color is Starcraft Camouflage Brown. Owner Greg painted his Evinrude with Rustoleum Flat Brown – which is a very close match.
I thinned the FME with Penetrol – as per Lou’s advice – and Greg still has a half-gallon for future use.
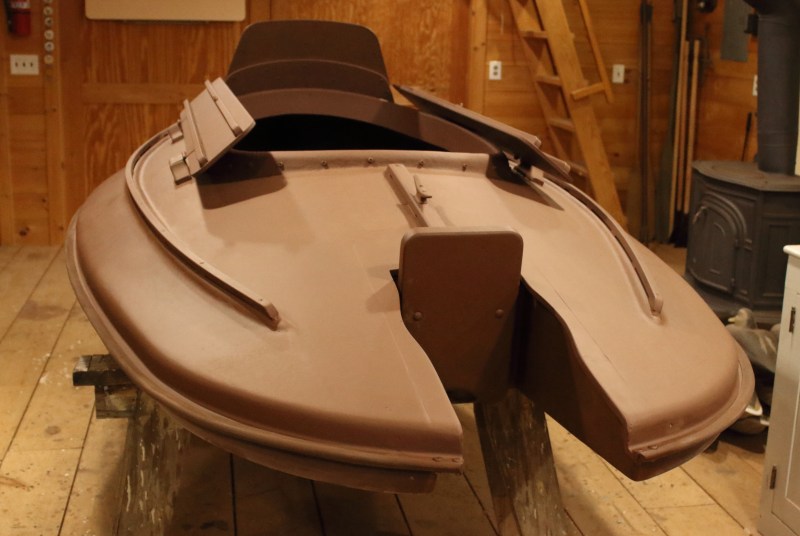
Here is the vessel just before the first of 2 coats.

Here she is without the spray shield.

A portrait of the finished product – from the bow….

From astern….
Still on the horses….


Airborne – ready for the trailer….

…or for Outer Space…..

Ready for the highway.

And – finally – the satisfied customer. (He really was smiling most of the time!)

I am looking forward to seeing this South Bay covered with Salt Hay – and with braces of Black Ducks, Brant and Broadbill.
All the best,
SJS
![]()
