

This step-by-step is a companion to the Carving a Mallard Head – Tutorial. As with the head, this bird happens to be a decorative, but the process is the same for a hollow wood gunner. I like round-bottomed birds for the mantelpiece but prefer a flat bottom with a keel for life on the water.

1 – Draw profile onto body and bottom board.

2. Draw plan views on both; round the stern on the bottom board.

3. Saw profile on bottom board; leave 1/4 uncut to secure block until later.

5. Bottom board is noew ready for shaping.

4. Saw out plan view then snap off waste pieces.

6. Saw out body profile by starting with neck elevation. Proceed with profile then with plan as with bottom board.

7. The body is now ready for marking with reference lines.

8. Check again plans.

9. Ready for shaping botto

10. Mark outside edge and the hollowing area.

11. Mark center line and flat-tish area on bottom board.

12. Mark edge, center line and hollowing area on bottom surface of the body.

13. Mark “ridges” along wings and “shoulders” (scapulars).
 cleat to body.")
14. Screw a hardwood (maple) cleat to bottom board.

15. My machinist’s vise is mounted on the bench corner to allow access from many angles.

16. A nice sharp draw knife does almost all of the shaping.

17. Make lots of chips, shards and shavings!

18. The draw knife can remove razor-thin slices.

19. Rough shaping is complete – all done with drawknife so far….

20. Smooth with the block plane. It’s always tangent to the convex curves so it avoids digging or hollowing.

21. Bake the branding iron in the Defiant until it glows…

22. Burn it deep. Rock it slightly left & right and up & down.

23. Orbital sander with 40 grit smooths everything nicely for now.

24. Pad the table and set the drill press depth to about 1/2 ” – with a 1″ Forstner bit.

25. I clamp my shop vac intake to the table to get most of the chips – some need help finding the vac.

26. Drill perimeter of bottom board first – just go to a safe depth for now. Drill the center to the full depth.

27. Rock bottom board up on its side to complete drilling around the edges.

28. Bottom board is done.

29. Mark neck perimeter and angle of the head.

30. Mark the outer edge of the tail.

31. Mark the “stern” of the bottom board on the underside of the body.

32. Screw the hardwood cleat to the body and put her in the vise. Start shaping the body with the drawknife.

33. Use the gouge around the neck – but leave plenty of “extra” for finer carving later.

34. Use the gouge to hollow out between the primaries and the tail “deck”.

35. Hollow under the tail with the gouge.

36. Refine the neck area with the knife – but still leave some extra stock.

37. Set the head on and check for “the look”.

38. Mark a reference line on the outside of the neck twist.

39. Mark the centerline on the “front” of the neck – even though it’s facing aft.

40. Hollow more closely under the tail with a coarse rasp.

41. Lay out the wings, tail, side pockets, etc.

42. Sand with coarse grit to get final shapes.

43. Lay out the lines once again – for finer relief carving with smaller tools.

44. I use Warren Cutlery gouges and parting tools also with my trusty X-acto # 22.

45. Lay out detailos once again!

46. Sand to 150 grit. I use coarse and fine rifflers along with sandpaper to smooth beneath primaries, at top of pocket, et cetera.

47. Hollow body as you did with the bottom board. Be sure to check the thickness frequently with a high-tech “digital feeler gauge”.

48. With the head off-center, I had to hollow nearer the wall so I could pre-drill (slip hole) for the head screw – the only real fastener in the bird

49. To keep the body halves from sliding during glue-up, I use 3 solid brass escutcheon pins..

50. Press them into the body – not the bottom board fore and aft. Leave them about 1/4″ proud.

51. Snip them off at an angle.

52. Leave about 3/16″ showing.

53. Press the 2 halves together – without glue – to check fit. Mark several witness lines around the seam.

54. I use a single padded wood clamp held in my vise. The padding is wrapped with cellophane tape so epoxy will not stick.

55. I use a marine epoxy thickened with colloidal silica (Cabosil).

56. I mix it to the consistency of mayonnaise.

57. Drill a pilot hole into the head – slip hole has already been drilled through body.

58. Spread glue thoroughly and generously on both head and neck mating surfaces.

59. Screw head to desired position the spread glue on both body halves.

60. Clamp firmly but don’t go crazy – so glue eases out of joint and seam appears tight all around.

61. Scrape excess off with tongue depressor or putty knife but do not wipe aggressively with a rag because it could pull glue out of the joint. Let it cure overnight.

62. Once fully cured, shave the perimeter with an older X-acto blade – no need to dull a good blade for this job.

63. sand with coarse grit ACROSS the seam – to maintain body contours.

64. Entire seam should be tight without any gaps.

65. Leave the neck contours until last. It is the most challenging and the most satisfying. Make sure the curves look fair from every perspective.

66. Neck view # 1.

67. Whole bird – starboard view.

68. Neck view # 2.

69. Neck view # 3.

70. Whole bird – port side – ready for sealer.
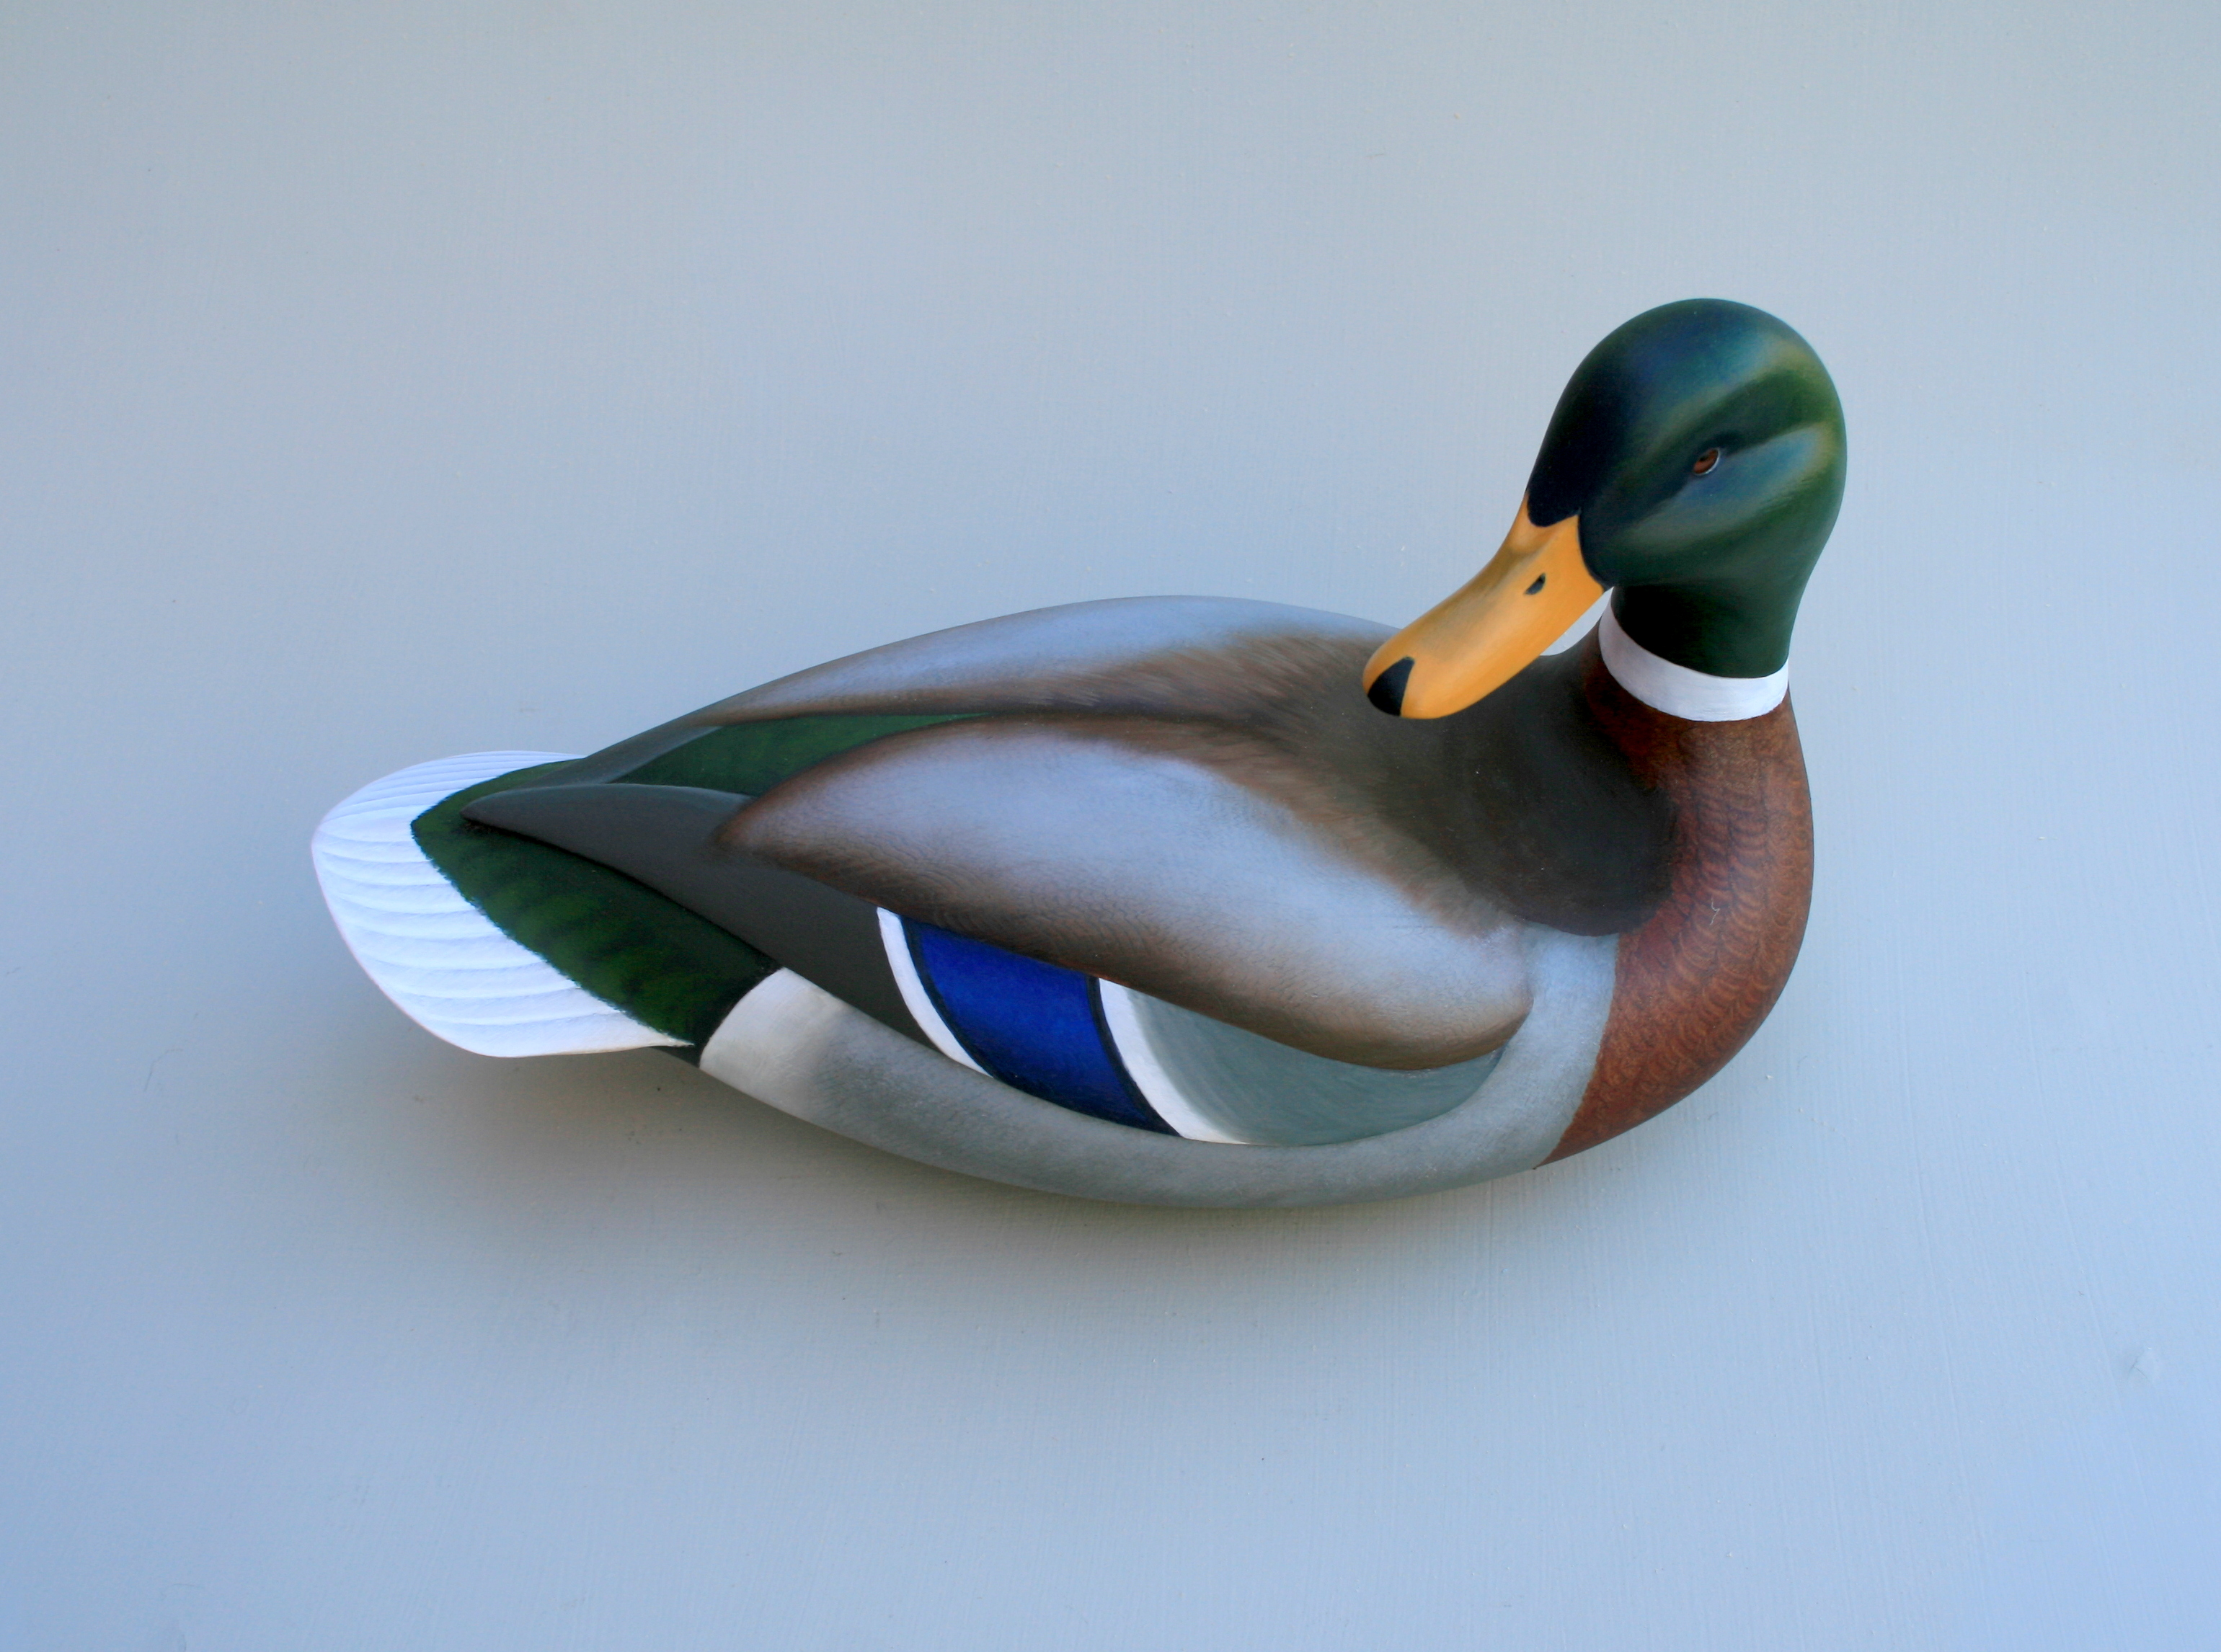
Here is one view of the painted bird:
![]()

Dear Mr. Sanford.
What type of wood is used in this carving? Suggestions of wood for someone just starting out? And Wiley cork company is no longer. Any suggestion for the same quality different location?
I am truly amazed at what u do. I just found your site. Amazing!!