
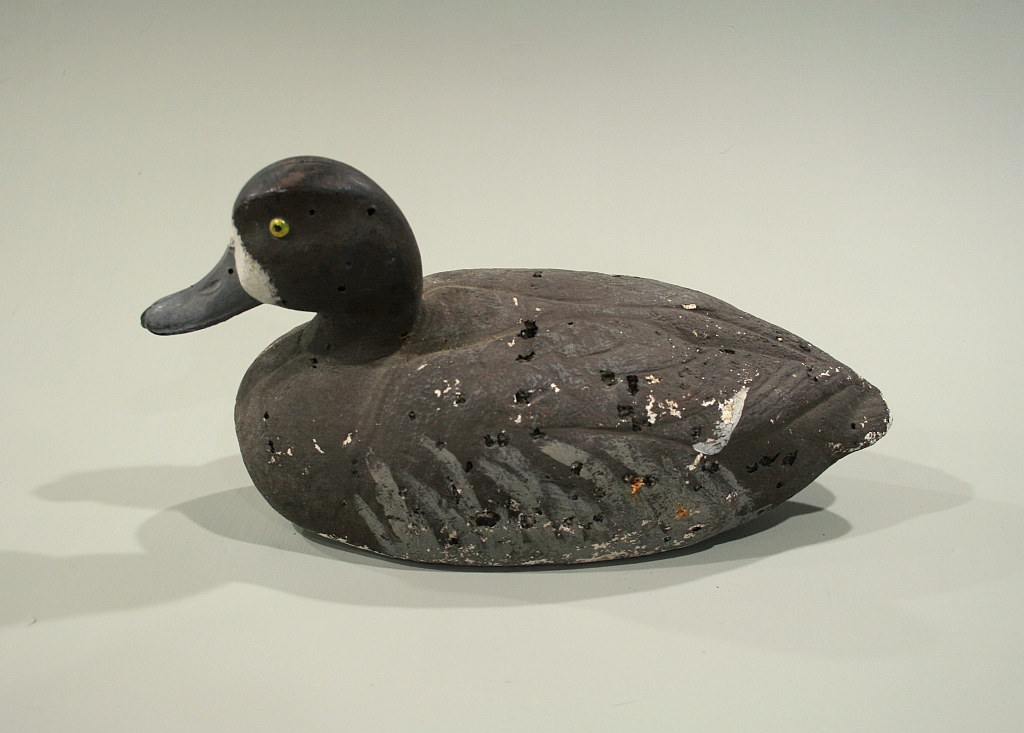
This bird was new in the early-80s – and stopped a load of shot on her very first day afield.
Impressionism and gunning decoys
Re-painting gunning stool is one of my favorite off-season “chores”. Whether in the post-season of the warm winter shop – or the late-summer pre-season when the anticipation begins to build, I always savor putting any of my “stuff” back into shape. Re-painting gunners is satisfying from an artistic perspective, too, because I can relax, paint quickly, and practice my Impressionism. The impressionistic approach is important for a couple of reasons. First, gunning birds are tools. Their job is to attract others of their species – at least to within gunshot range. Details that look wonderful in the hand or on the mantel are lost on the water. More important, though, is that some of the “details” that may look wrong up close look just right in the rig, in broad daylight, at gunshot range. So, just as the brushstrokes in any Impressionist painting may look “wrong” upon close inspection, they do their job well when viewed at the intended distance. Thus, some things are exaggerated on the bird-in-hand so that they will do their job when in the rig.
Herter’s Model 72 Bluebills
Many of the birds I am painting here – I am starting with the Hens first – are the original Herter’s Model 72s from the late-1950s, bought by my Dad. They have the soft styrofoam (Durlon) bodies and the hard plastic heads(Tenite butyrate) with cast iron ballast molded within the keel. Of my 40 Bluebill – Broadbill to us East Coast/Great South Bay gunners – most are the earlier birds with the flat bottoms. The earliest have the brass screw eyes holding the heads. Later birds went to steel screw eyes and then a deeper keel was molded into the foam. The salt water habitat of my decoys rusts both the steel screw eyes and the iron ballasts. In the worst cases, the ballast weights shed big flakes of iron and break out of the foam bodies.
This rig was in fairly good shape. These 40 decoys have sat unused on a high shelf in my barn since the mid-90s. Most had fairly good paint and none had lost heads. But, I decided to “upgrade” them all with a new skin of epoxy-saturated sawdust. The Herter’s foam birds were never good at holding paint and they do not develop “character” when the paint peels and flakes – they just look neglected. And, because I plan to use at least 30 of these in my newly-restored Great South Bay Scooter next winter, I want them to look sharp.
Repairs first
Although none of this batch had broken heads, I decided to reinforce each to prevent it in the future. So, I epoxy a small triangle of 6-ounce ‘glass cloth on the lower neck and chest – to distribute the forces when birds are picked up by the head – as they always are.

The whole bird is first saturated with marine epoxy.
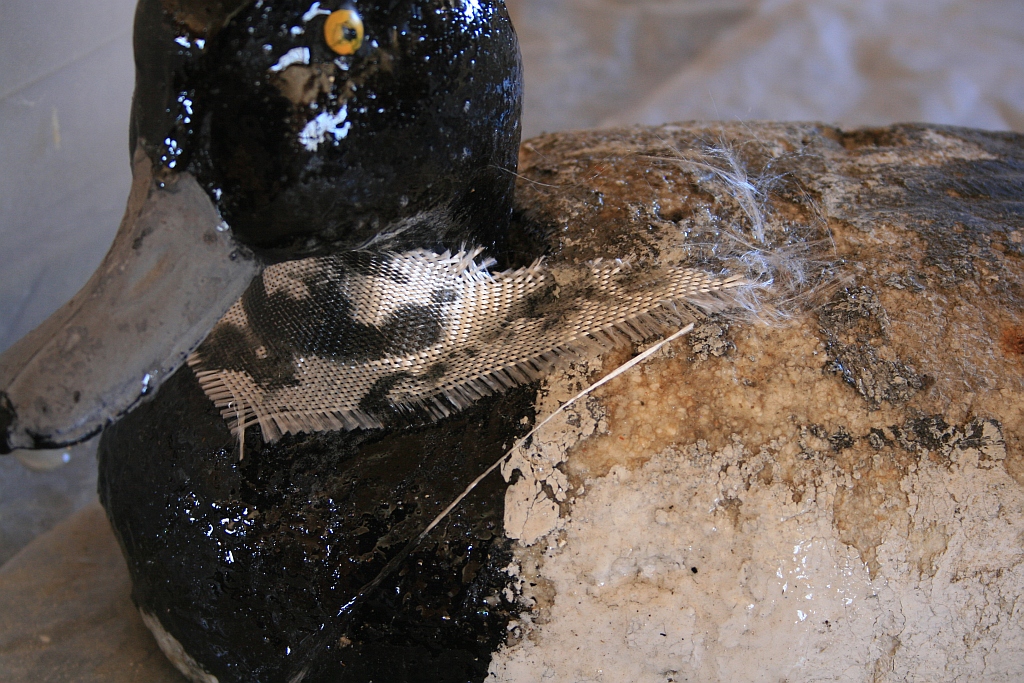
The ‘glass is wrapped around the base of the neck and pressed into the epoxy.
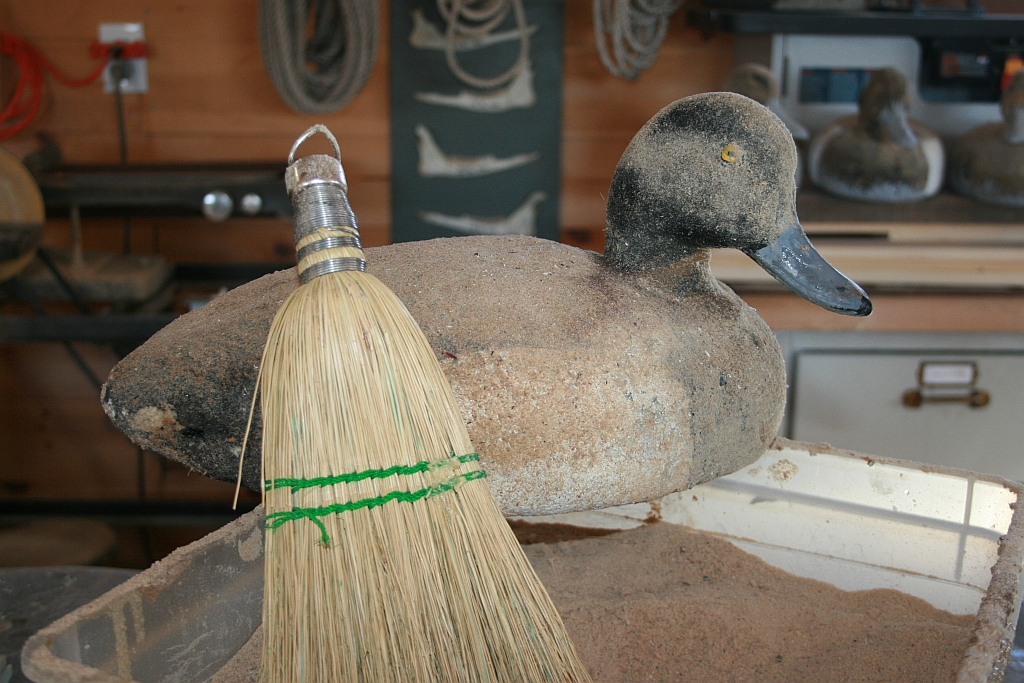
While the epoxy is wet, I sprinkle fine sawdust – from my band saw – over the whole bird except for the bottom. Once the epoxy cures -usually overnight – I brush off any loose dust.

The ballast was escaping from a couple of birds. So, I filled with thickened (microballoons) epoxy and then ‘glassed over.
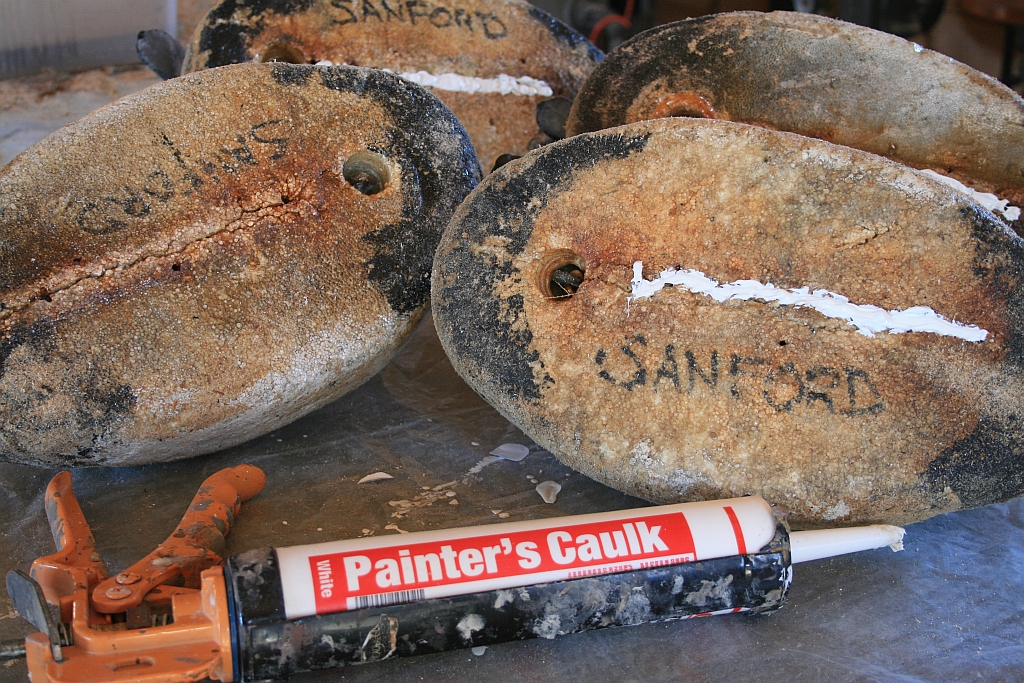
The next step is to fill any major crevices with a simple caulk.


Shot holes were filled as needed. The caulk was smoothed with either a brush or a finger.

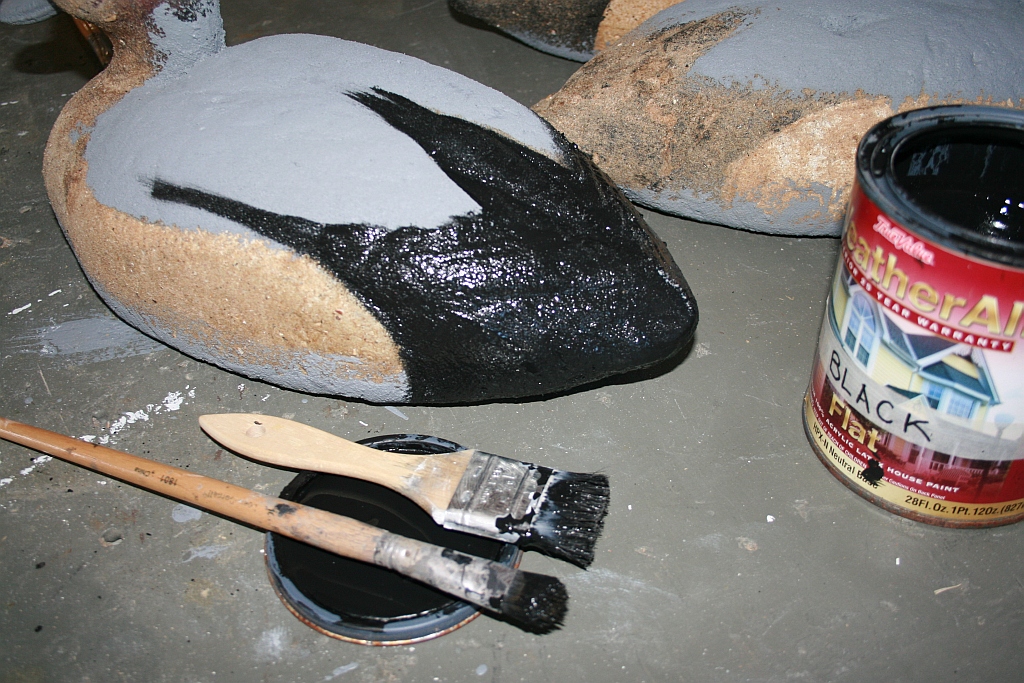
The first paint to go on is a Grey Primer. I like it for the bottoms of decoys because I can later write my name or initials on it with a Black marker. I also paint the bills with this color – especially on the Drakes. And, although primers are not intended as topcoats, I figure that decoys are exposed to the elements only occasionally – when compared with other truly “outdoor” stuff.
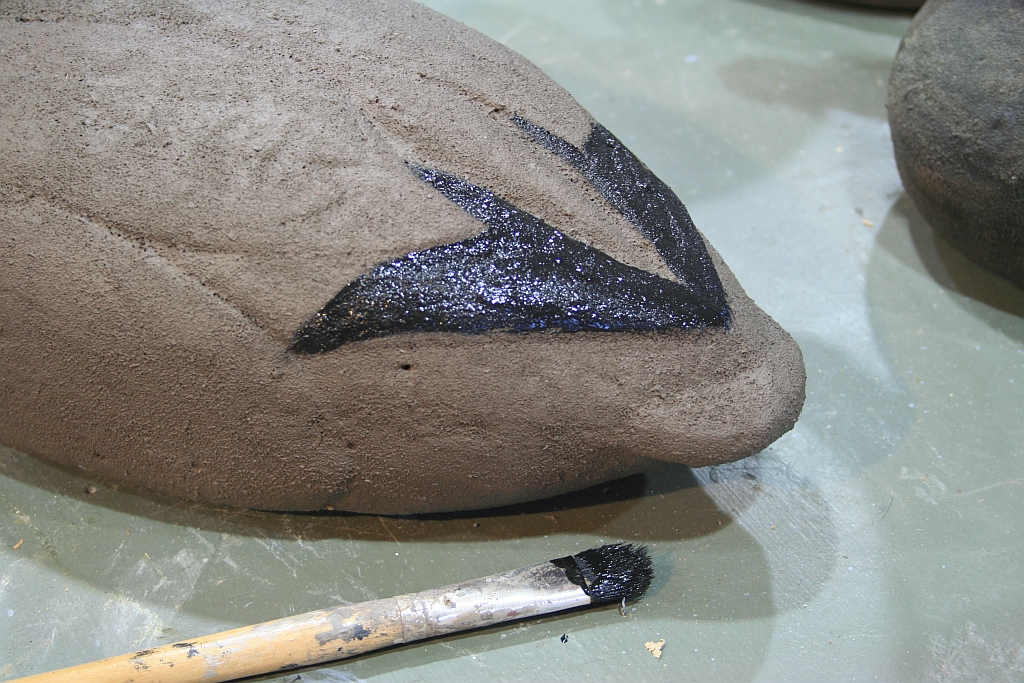
The first step is to paint all of the birds – I am doing a batch of 16 Hens – with a dark brown. I use acrylic latex house paints. I usually get sample jars from Home Depot. Their Behr Ultra Flat is about $3 for a 7.5-oounce jar. The Behr brown I like is Fedora (S-H-740) – but, in this case, I had a quart from my local Ace Hardware – so I used their Clark & Kensington “Caledonia” (D11-7). I use a 1-1/2″ chip (throwaway) brush for the larger areas and tasks. I used a smaller “flat” bristle brush for the Black primaries. This is an example of where I exaggerate for effect. The flight feathers on a Hen Broadbill are a dark greyish- brown, but I use Black to increase the contrast so that it suggests a 3-dimensional effect on the bird.

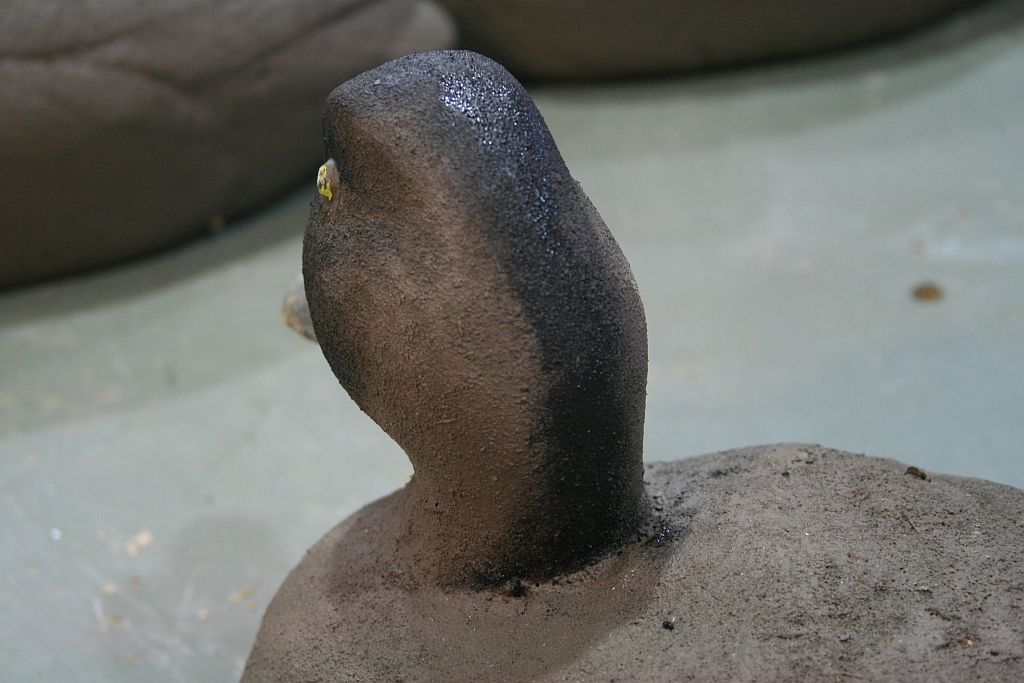
Likewise, the head on a Hen is a very dark brown. I use Black on the face and over the crown and neck to suggest depth to the head.

I drag the large brush with very little Black over the chest to make it darker and rougher looking. The coarse surface of the epoxy & sawdust makes it easy to do.

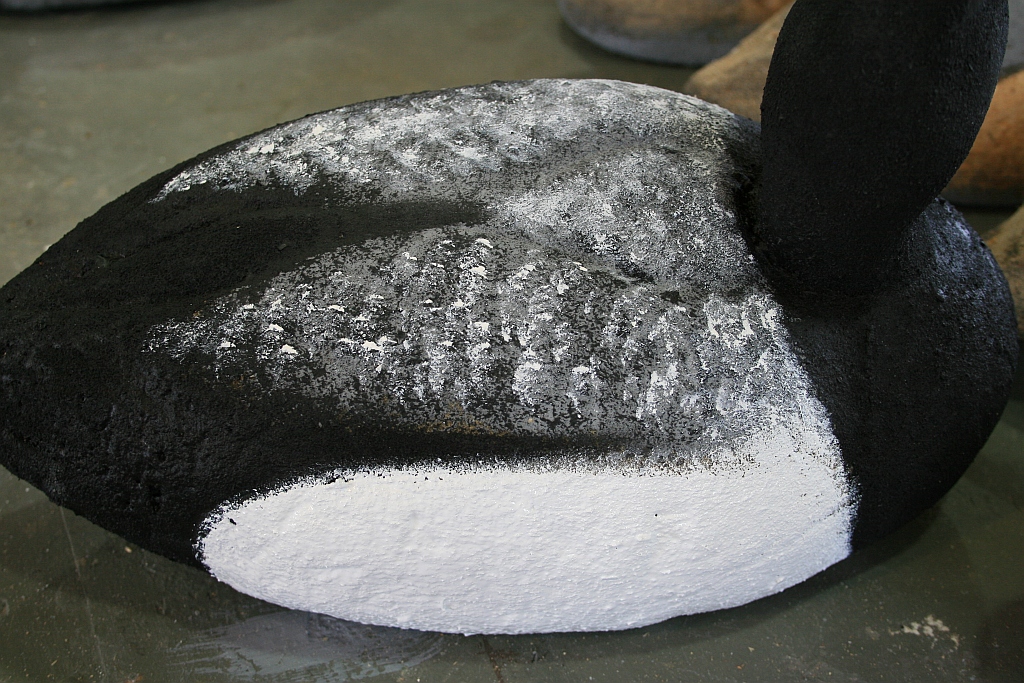
This photo shows the desired effects both foreward and aft.


I bought a very small bottle of acrylic paint for the eyes – from a crafts store. They call the color “Plaid” – but you should look for a Deep Cadmium Yellow – like egg yolks.

The white in the speculum/secondaries is next. As with the live birds, I usually do not show the speculum in Drakes but I do in Hens. I drag the White forward to soften that edge a bit.
The White on the face varies quite a bit in shape – so I vary it too. It is useful to type “Greater Scaup Hen” into Google Images and see the different shapes of this patch.

I scallop the back with the Grey Primer. I just suggest the edges of feather groups and use the Grey sparingly. On smoother birds, I usually stipple this area with the end of a dryish, stiff-bristled brush.

The barring on the sides is suggested with Behr Ashwood (720 D-4). This pale beige/tan is dragged together lower on the sides – near the chine”. I soften spaces between the brightly defined feather edges with a dry brush.

The bills are next. Hens have darker bills than Drakes, especially in late-season when the Drakes are in full color. I just happened to find this sample jar – Benjamin Moore 555 – for $2 in another hardware store – so I grabbed it. I had been planning to use my Grey Primer darkened with a bit of Black. This is actually a bit too blue for Hens – but I like the way it looks and I really do not believe it will flare any birds.

I use a filbert-tipped brush to paint the nails and the nostrils. I use the flat of the brush for the nail and just the edge of the brush tip for the nostrils. The Black on a Greater Scaup bill extends beyond the nail itself so I paint it nice and big.

Time to “dot” the eyes. The pupil should be very slightly forward of center.
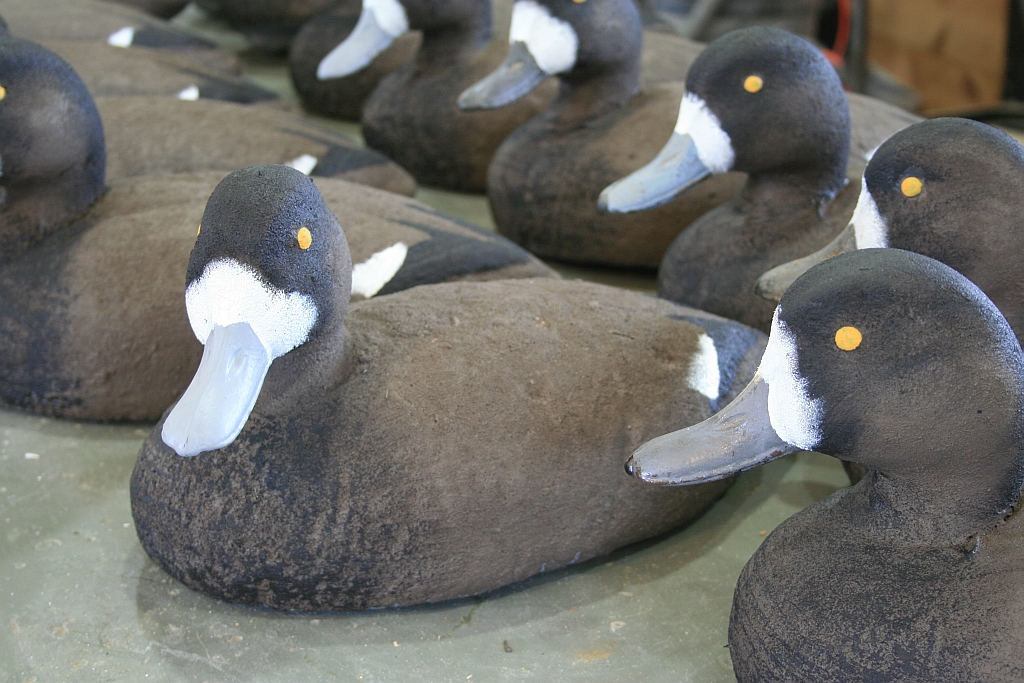
Done! These are the dozen “original style” – the older flat-bottomed birds that I will use in my Scooter. There are 4 more Hens with keels – to be mated with 6 keeled Drakes.
Now…onto the Drakes….
The Drakes are easier
No custom colors are needed for the Drakes. Th Grey Primer serves for the bottom, the base color on the back and the finish color for the bill. Once the bottoms are dry, the backs and bills are painted in the same step.

I cut the bristles on a 1-1/2″ chip brush short to make them stiffer. I use it to cover most of the larger areas.
I switch to the smaller “flat” for the finer areas and edges – such as around the eyes and the base of the bill.


Next, I use the larger – but fairly dry – brush to drag some Black over the back – heavier aft and lighter forward.
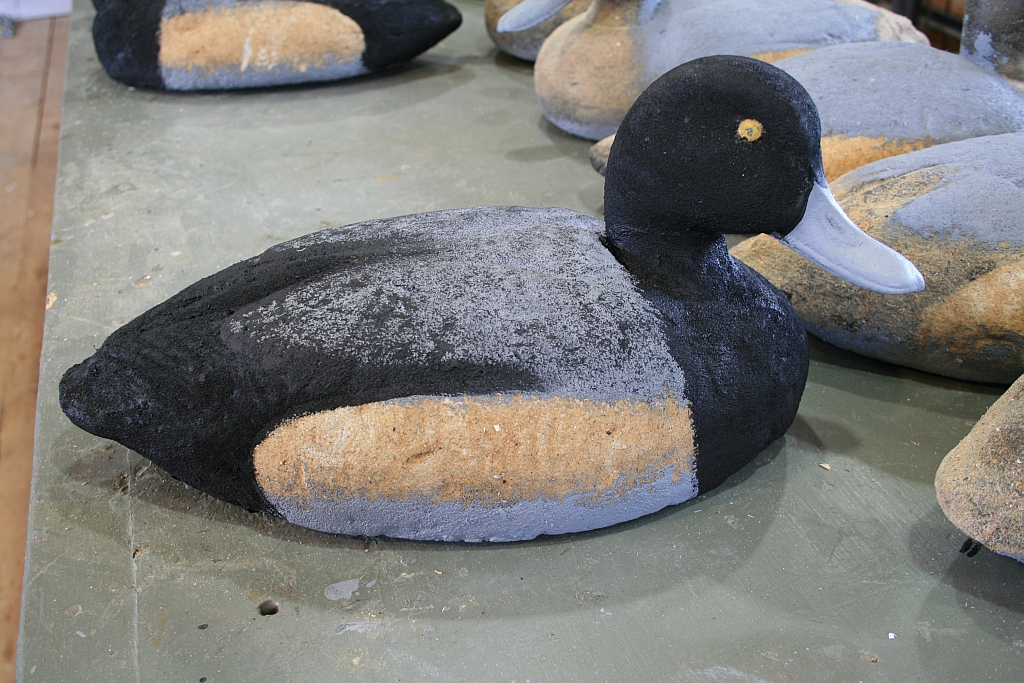
After all the Black areas are good and dry, I paint the sides White and then stipple the back with it, too.
It is a bit easier to control the amount of White on the back with the smaller “flat” brush – hitting the end of a fairly dry brush onto the back. It being the third “color” – in addition to the Grey and Black – the White can make the back “pop” like the real vermiculation does. To my eye, the back of a full-plumage Drake is one of the most arresting close-ups in Nature.

As with the Hens, the eyes still need to be painted – that egg-yolk Yellow – and dotted. And the bills need nostrils and broad Black nails.

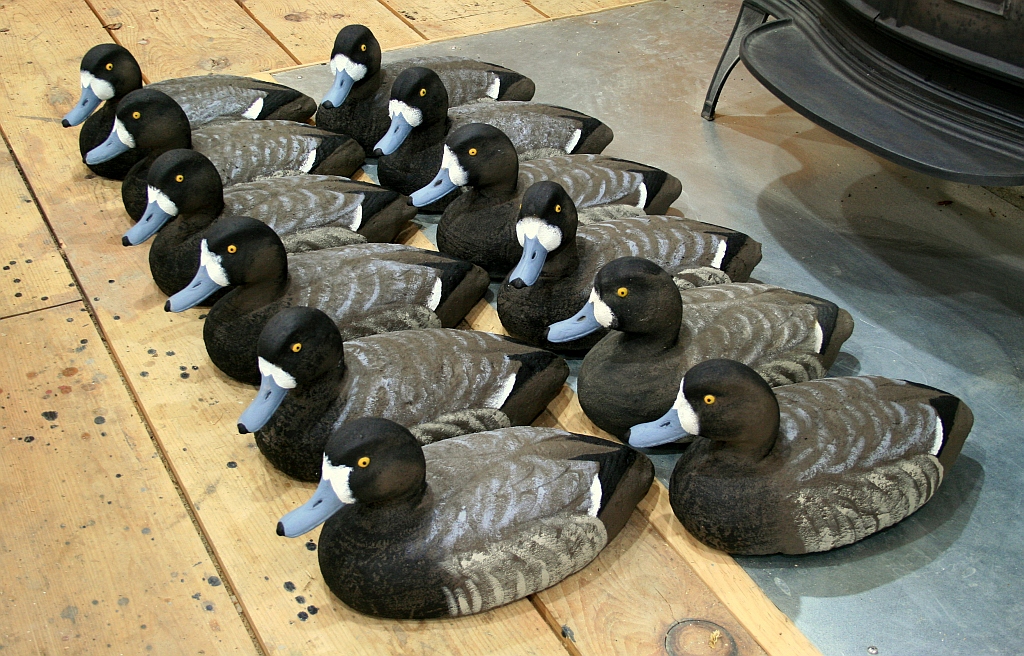
The are the 10 full-keeled (newer) Broadbill I have – ready for lines and anchors. I still have another dozen flat-bottom (older) Drakes to finish.
![]()

Great site. I just got 18 herters I don’t know what kind. Is it possible to send a picture to you maybe you will know what model. I plan to repaint them. I to have a decoy problem. I don’t need anymore but that does not stop me. Thanks Bart
Does the epoxy had significant weight to the decoy. I was considering a similar method,but using Titebond 3 instead?
I would just like to start this post by saying that your work is absolutely amazing. Thank you for posting all this information up. I just picked up a bunch of old herters like the ones above. I’m in the process of painting 17 females. My concern is that the flat black I have seems to still have a pretty good shine to it. Should I be concerned about it flaring birds? Should I try a new paint and go over the black that’s on there now or is there something I can use to get the shine off a bit? Thanks for your time.
This website is an excellent resource. Herters are great decoys and compromise a large portion of my own personal and guide rig for years. I have too many of these foam blocks to count at this point- 63, 72, 81 and 92 size legacys from my grandfather’s rig and my own , some dating back to the 50’s. Your tutorials and blogs inspire us to dig them back out of the archives and breathe new life into classic gunners. A little epoxy and paint and they will last many years longer. Thank you Steve !