
One of My Favorites
I remember this graceful goose from my earliest days – from my Dad bringing them home and from studying the Audubon Water Bird Guide and The Hunter’s Encyclopedia.
Although I first accompanied my Dad afield when I was about 5 years old – and began carrying a gun several years later – I did not see my first live Brant until I was 15. Luckily, I shot my first Brant the same day. And, later that weekend, joined our usual “gunning family” – Dick Simmons and his 3 boys – and got into a bunch of them. The limit was 6 per day then – and we shot Friday through Sunday.
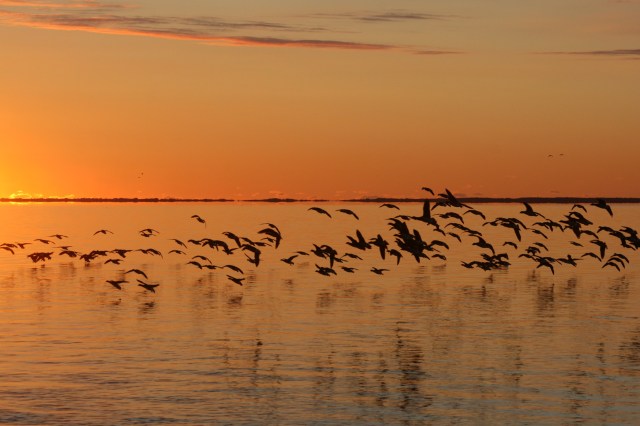
I immediately came under the spell of this Arctic bird. The flowing motions and soft croaking and yelping of an approaching flock are one of the great experiences in nature. I learned more about their biology in college and later worked with the New York crew to develop the first rocket-netting of Brant on their wintering grounds. We used a dozen Al McCormick Brant floaters to lure grazing flocks within range of the net. I later made 28 silhouettes out of a sheet of 1/4-inch plywood.
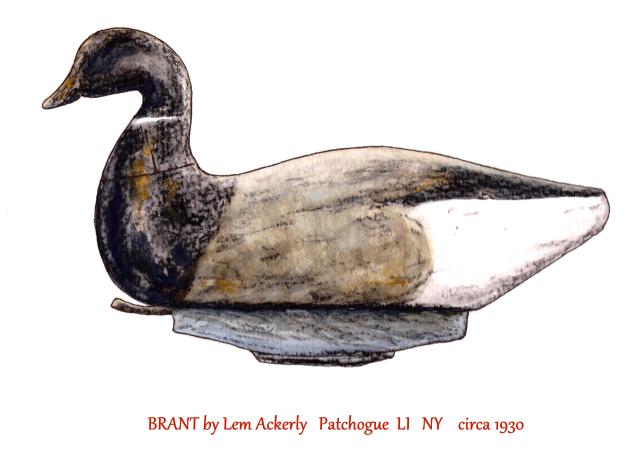
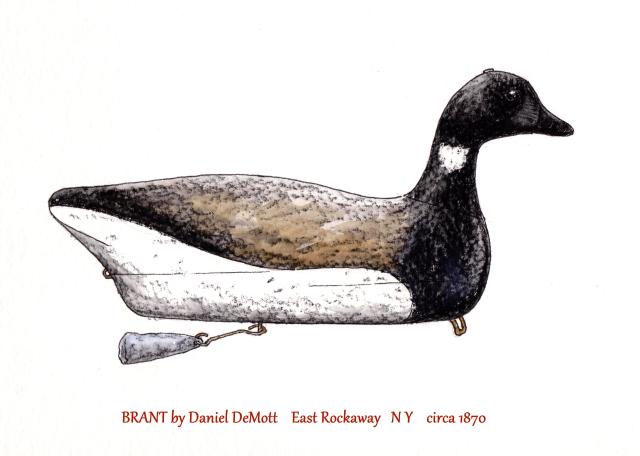
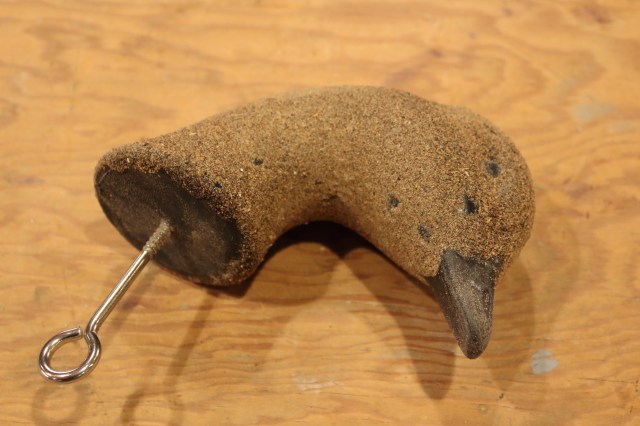
Brant decoys have been a part of Long Island gunning from the earliest days. Until recent decades, Brant fed primarily on Eel Grass (Zostera marina) – which rendered them excellent table fare. In the days of market hunting, they commanded the highest prices in New York City. The early decoys were the so-called “root heads”. Knots and branches from Pitch Pine trees provided a strong natural crook of dense wood with the “bill” sticking forward at the proper angle.
Later decoys used cork for bodies. Natural cork was used for flotation in life preservers. Many such preservers could be found along the Ocean beach after wrecks in the New York Bight. Thrifty baymen “re-purposed” the cork.
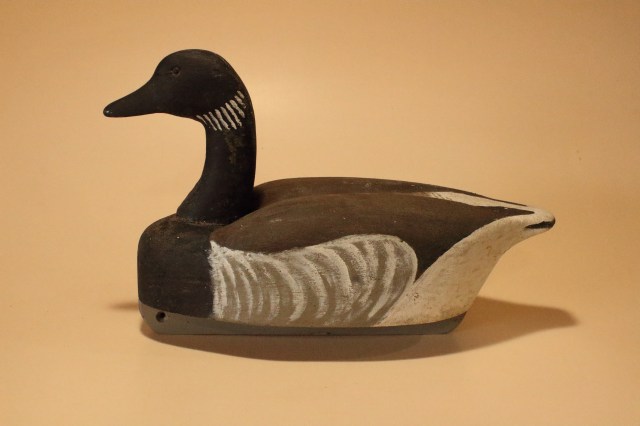
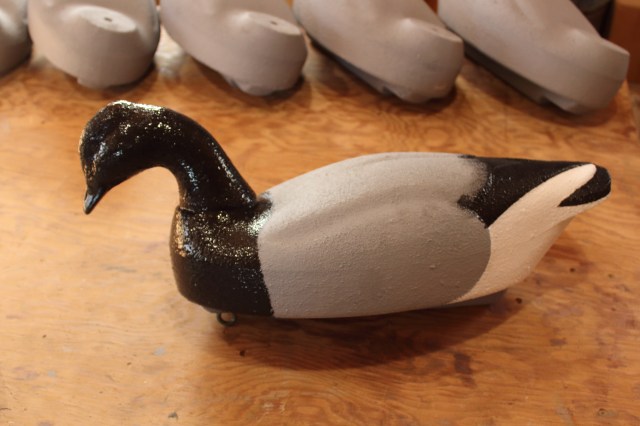
My Dad instructed me to paint up his 7 Herter’s Model Superior Canada Geese as Brant. I do not have photos of my original paint job – but I re-painted them in the 1980s thus:
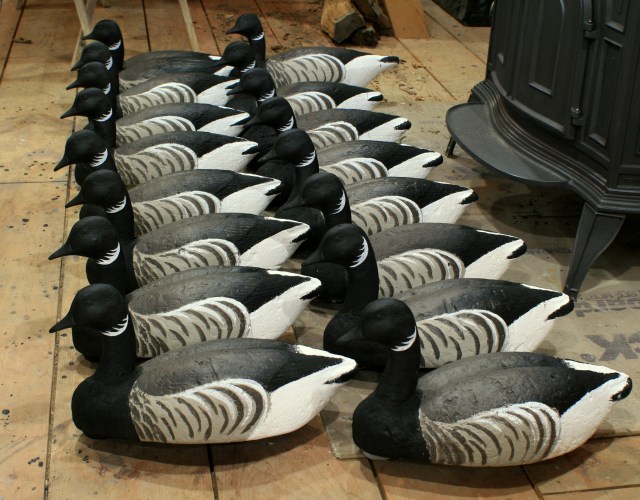
Elsewhere on this site, I show how I re-hab and re-paint Herter’s Model 81 Brant decoys. I still hunt over them with Craig Kessler and Fred Wertz on my regular jaunts to Long Island in December and January.
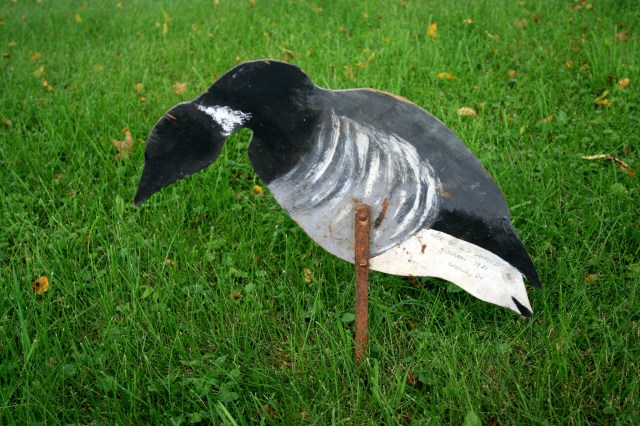
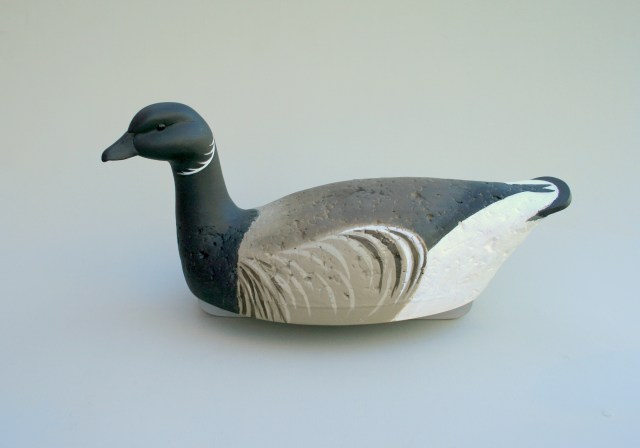
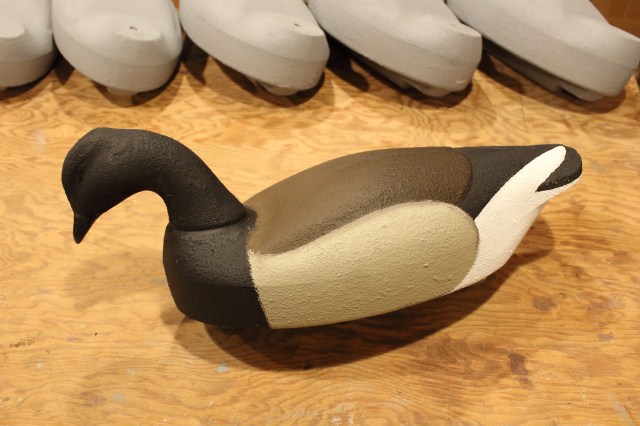
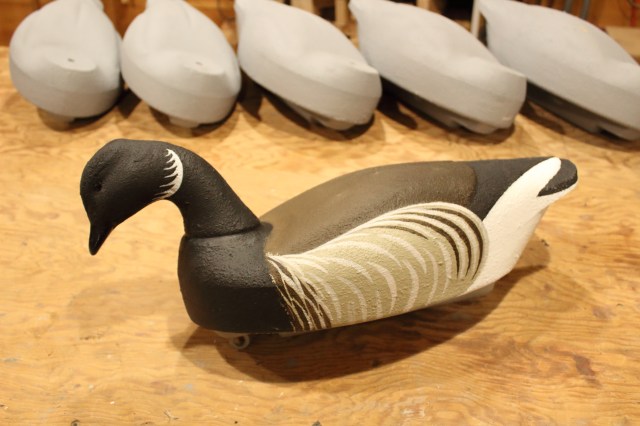
I occasionally carve a single Brant – just to work out the shapes and proportions. The body on this bird is “black cork” (aka “refrigerator cork”) – so it has both a bottom board and a tail insert for strength
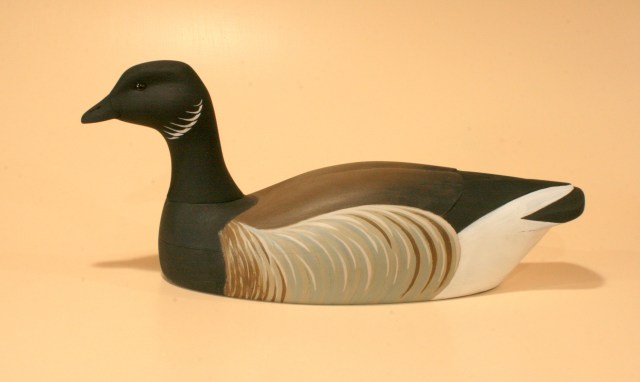
I painted these E. Allen Brant a few years ago for a Long Island gunner. New Jersey’s Paul Dobrosky had carved the master. They are a fine bird – made from a dense urethane foam – and sold through Lou Tisch’s Lock, Stock & Barrell in Michigan.

Enter Homer Decoys
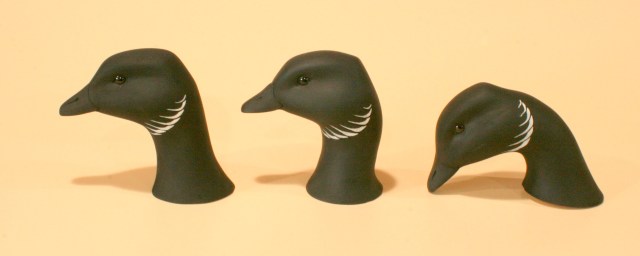
Several years ago I became aware that some enterprising waterfowlers out in the Mississippi Flyway were making a new line of decoys ( www.homerdecoys.com ) . I got in touch with Tony Homer and offered to carve a Broadbill head for his nice diver bodies. One thing led to another and he asked me to carve the whole bird for a new Brant decoy. So, I carved a wooden body – carefully shaped so it could be removed from a mold – and three head postures.
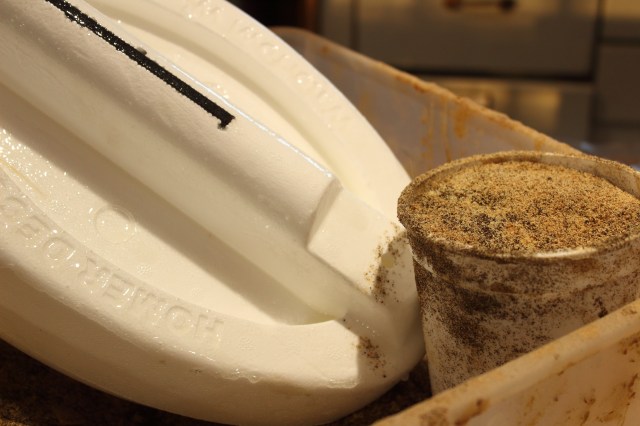
At Tuckerton last September (2017), Tony presented me with a half-dozen foam bodies and their 6 indestructible feeder heads. I also drove home with a box of Homer’s “special blend” of crushed walnut shells ~ Homer Coat. These finer particles are the ideal size for coating the bodies.
I delivered the 6 Brant to a good friend just yesterday. I coated and primed all 6 – but painted just one as a sample. He will enlist the aid of his two young boys in finishing them later this winter. Here’s the process….
Coating & Priming
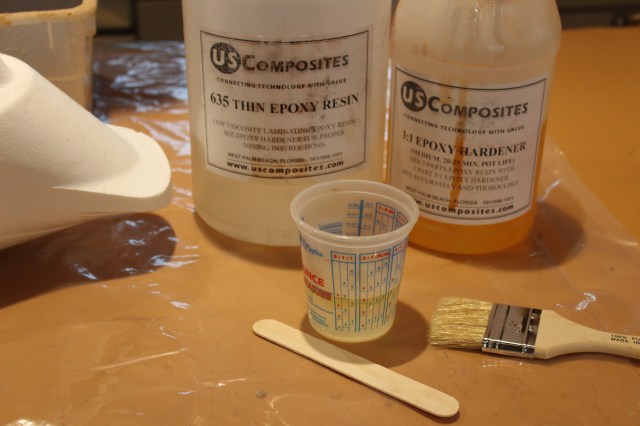
I coat these decoys to provide a tough skin and a rough surface that will prevent shine. As I have for several years, I use a marine epoxy for the coating. Others use Titebond III or the like. I use the epoxy because I always have some in the shop – for both decoys and boats. I use graduated mixing cups to get accurate measures for the 1:3 (hardener:resin) ratio and mix for about a minute. I buy throwaway “chip brushes” and cups and mixing sticks by the case – to save on cost.
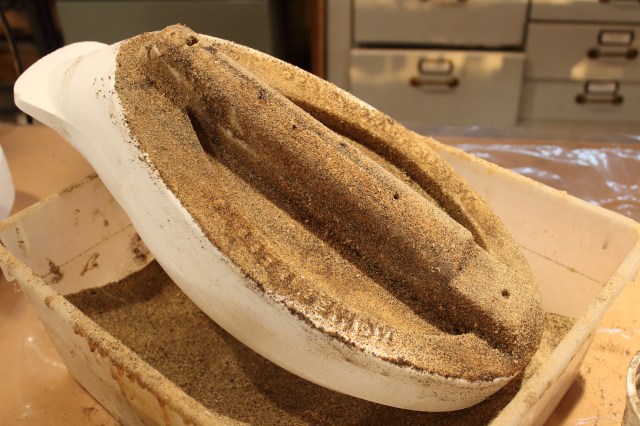
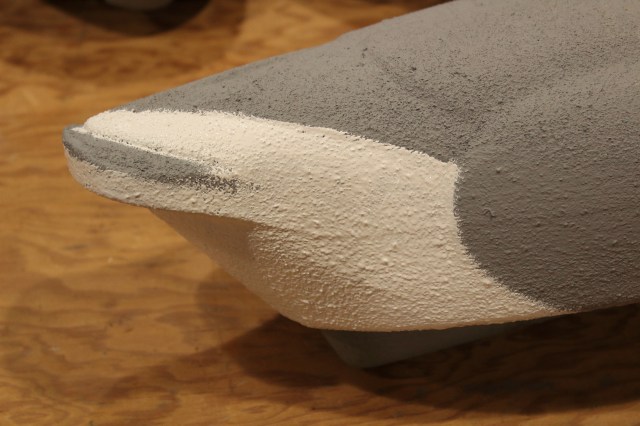
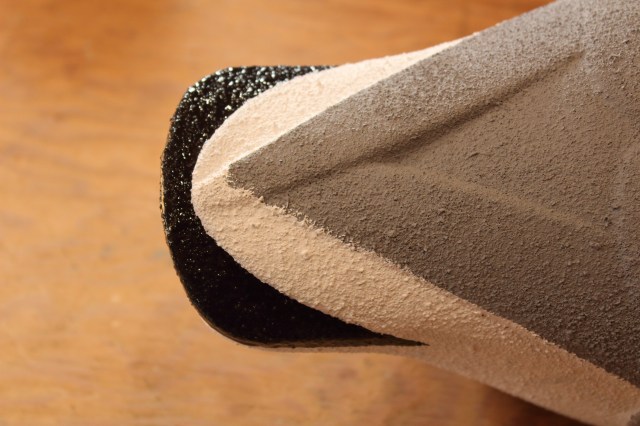
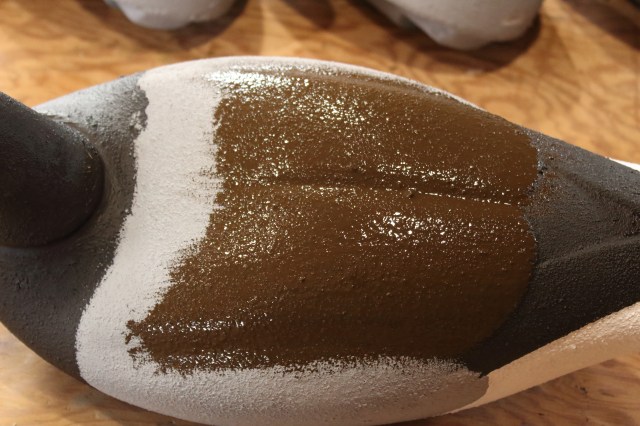
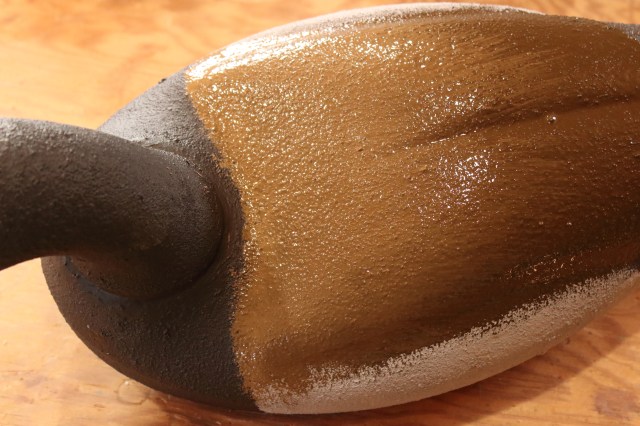
For large-bodied birds like these Brant, I coat in 2 steps: I do the bottom first, then the topsides the next day after the bottom has cured. After brushing on the epoxy, I sprinkle the ground walnut shells onto the body, working over a plastic tub to catch most of the excess.
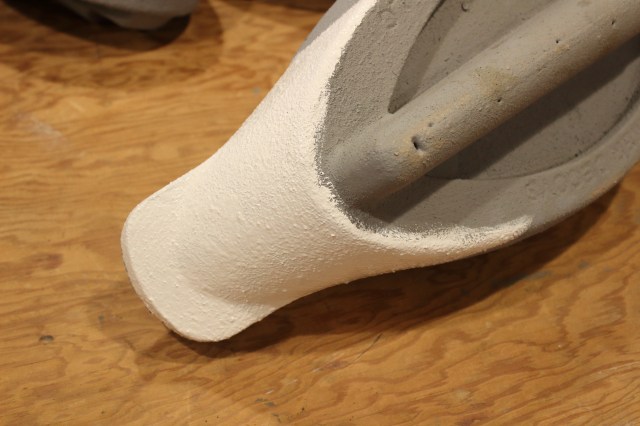
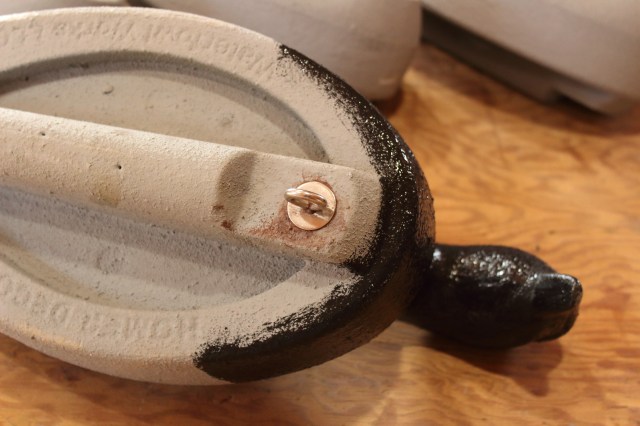
On decoys that have not yet been assembled, I coat the heads separately. I first sand them with 80-grit, then wipe them with lacquer thinner. The screw eyes are in temporarily – to act as a handle and a hanger (during curing). I avoid getting epoxy on the bill and eyes.
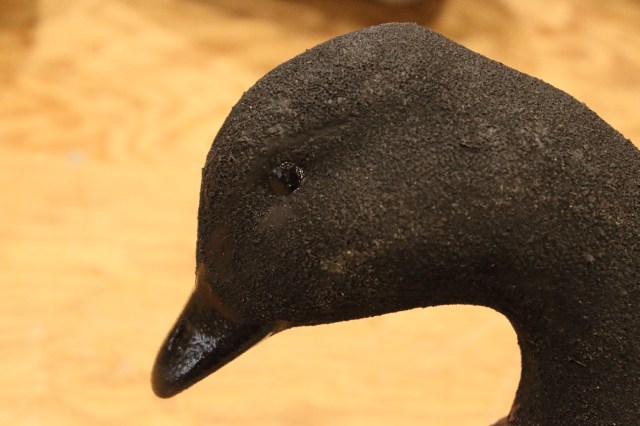
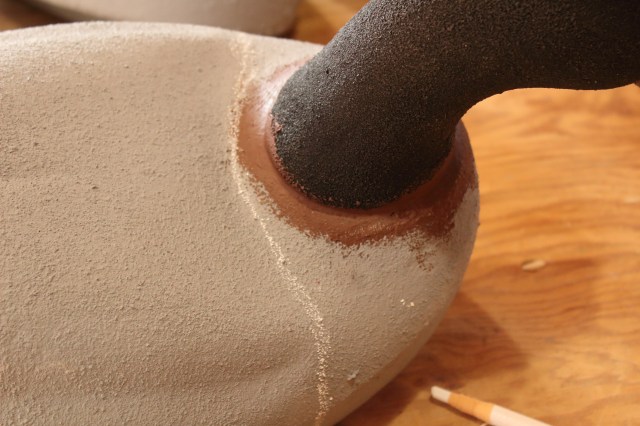
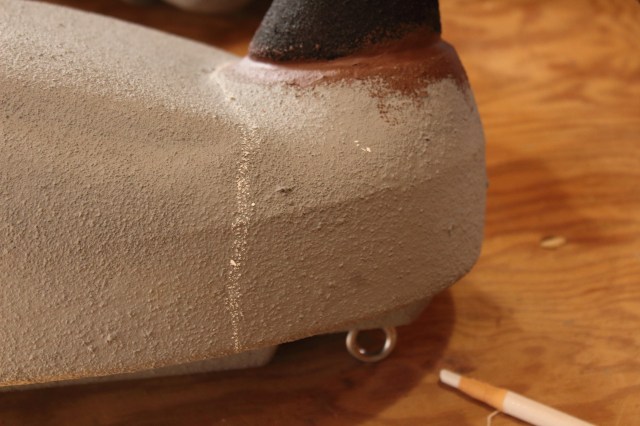
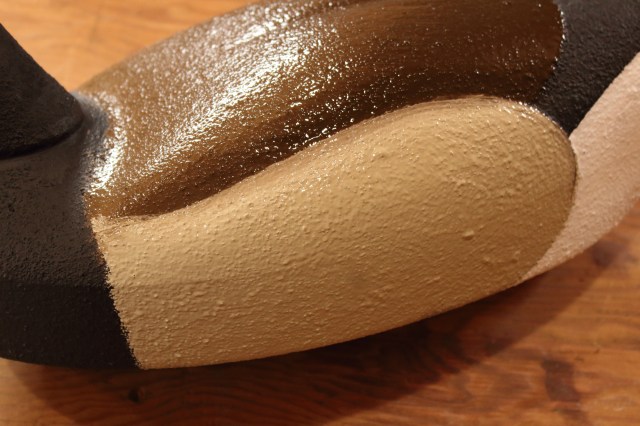
I prime the bodies with a Grey oil-based primer and the heads with Flat Black oil paint.
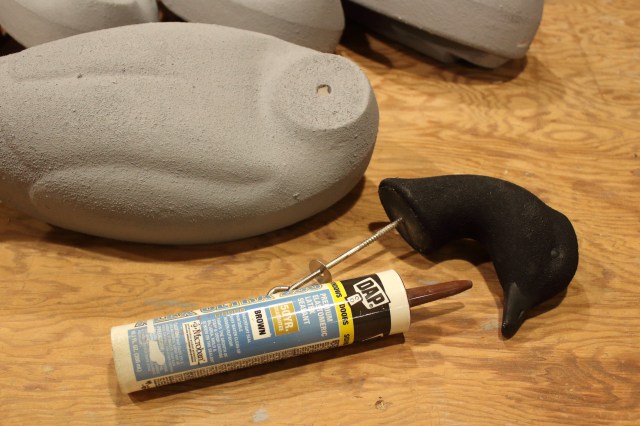
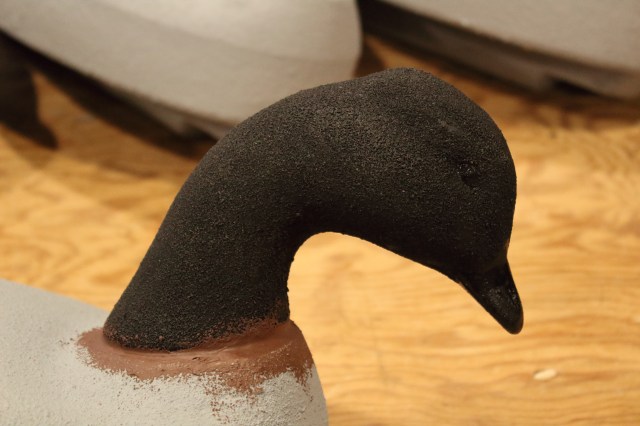
I use a paintable caulk between the head and the body. It keeps anchor lines from wedging in the seam and also acts as an adhesive to distribute the stresses of the head-body joint.

The bill and eyes are coated with Spar Varnish to add a bit of glint where it doesn’t hurt.
I use s/s screw eyes from Bob Metrich at Decoy Rigs (decoyrigs@comcast.net or 219-659-8371). I let the caulk skin over overnight – then everything is ready for final paint.
The Paints: A Trip to Home Depot
As I have for several years now, I help gunners paint their own rigs by suggesting colors that are easily obtainable at modest cost. Sample jars of Behr flat latex house paint serve the purpose. Although Flat Black and Flat White can be gotten pre-mixed at most hardware stores, the other colors can be challenging.
Finally, I will concede that oil paints are usually tougher than latex. However, I put cost and ease of cleanup as leading criteria. And, some gunners paint with latex and then topcoat with clear finishes, like Testor’s Dullcote or Krylon Matte Finish # 1311.
Here is the Behr Paint Schedule for Atlantic Brant. You should be able to save the image and print it on 8.5 x 11 paper for handy reference when you go shopping.

NOTE: The Aging Barrel on the cape is not critical. The back is lighter forward and darker aft. So, an alternative is to apply a bit of Ashwood behind the neck and drag it into the wet Espresso Beans on the back to blend it.
Painting ~ Part 1: White & Black
Start at the stern. Because any bird’s feather overlap from head to tail – I always begin painting at the aft end of the bird so that the paint can overlap like the actual feathers. The buoyant Flat White stern on Brant is one of the most prominent field marks.
I use a wide (3/4″ or 1″) flat bristle brush for large areas of color such as this.
I use chalk to draw the break between the chest and the rest of the body
The line is mostly straight down – but angles aft just a bit.
Brant show much less of their Flat Black tail feathers than do Canada Geese. This is because the White tail coverts – upper and lower – cover much of the tail. The break between the Black and White is molded into the Homer bodies.
I do not bring the Black down the full thickness of the tail – nor do I put Black on the underside.

The primary wing feathers are molded in. They get Black – as does the rump between the primary groups. I use an angle brush for this job – to get a nice crisp edge.

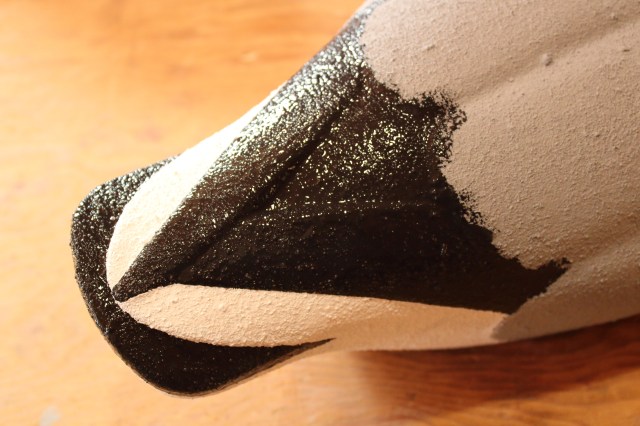
Black goes on the head and chest. I usually put 2 or 3 coats on these high-wear areas.

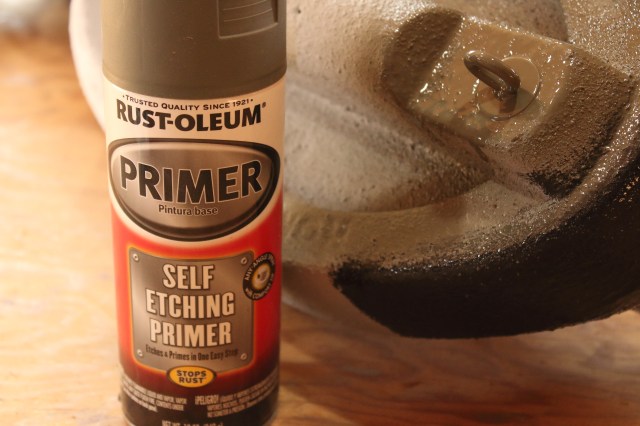
I hit the s/s screw eye and fender washer with Rustoleum Self-etching Primer.
Now it’s starting to look like a Brant….
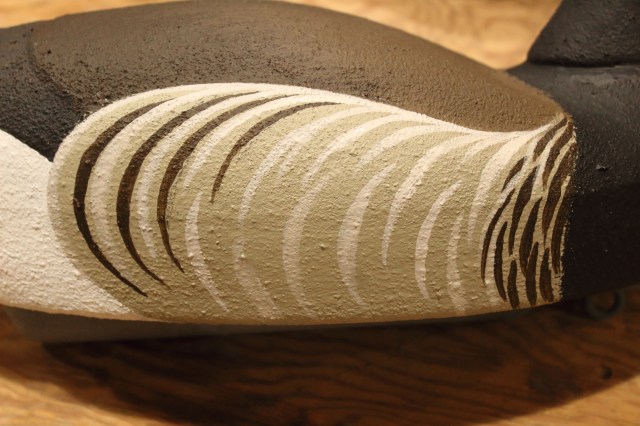
Painting ~ Part 2: Browns & Greys
The back of a Brant is a muddy brown/raw umber that is darker aft and paler forward. It does not have a reddish cast – as I have seen on some decoys. The adults show very muted feather edgings; the young-of-the-year show pale grey edges. Neither is important to include on a gunning decoy, in my opinion. I use Espresso Beans on most of the back.
Behind the neck – on the cape area – I use the paler Aging Barrel – and blend it onto the wet Espresso Beans on the back. As mentioned above, another option is to not use the Aging Barrel, but instead use a smaller amount of Ashwood (base color on the sides) and blend and darken it with the Espresso Beans.
The sides get a base coat of Ashwood. I keep the edges between the other color areas crisp – because the side pocket feathers overlap the other feather groups above and behind.
I let the sides dry thoroughly before adding the feather edgings.
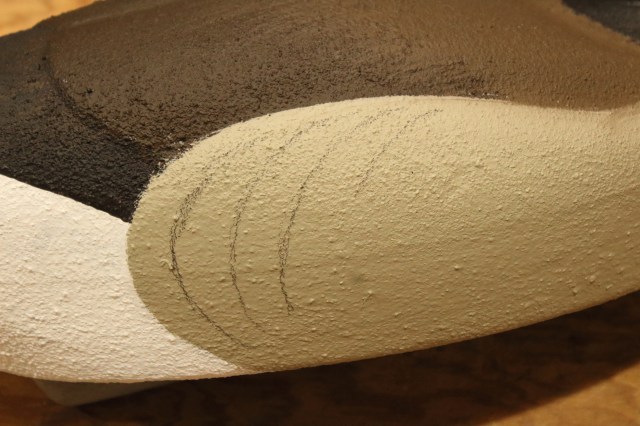
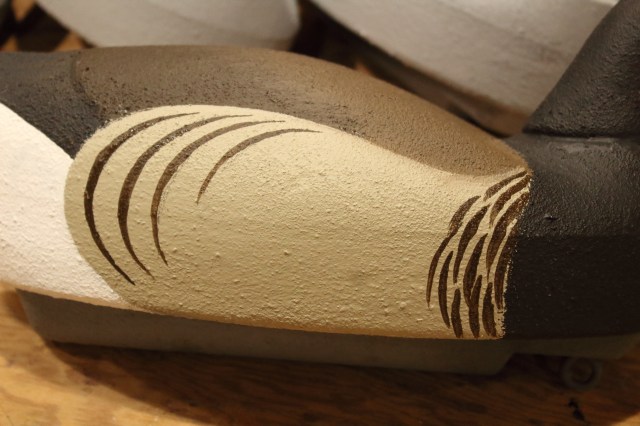
I begin the markings aft on the sides. Side feathers on Geese and Brant are much broader – and squared off – compared with ducks. I begin penciling in 3 curved lines that extend from the “top” of the sides almost down to the waterline. Here I added another line that extends only halfway downward.
I paint this “barring” with Espresso Beans – using either a small (3/8″) angle brush or a round (# 4 or 6) brush. I do one side, then jump to the other.
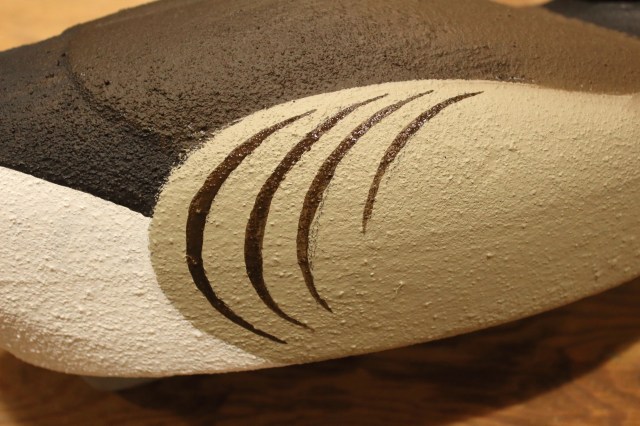
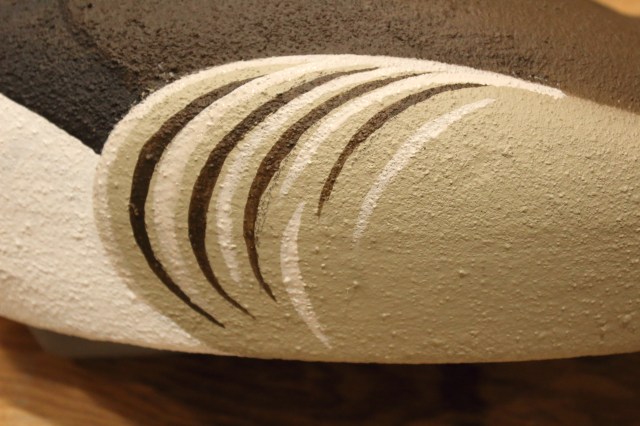
Right behind the Black chest, I use the Espresso Beans to paint smaller, closer curved lines for the first 1″ or 1.5″. If I were painting the Pacific Coast’s Black Brant, I would extend these dark markings aft to about 3 inches.
Here is the dark barring on the sides, completed.
Now I use Graceful Gray to edge the dark barring AND more forward. Note how the upper edges of the Graceful Gray all join together at the top edge of the sides.
I add feather edges in the middle of the sides. Each edging is about half as tall as the sides – and they are staggered like roofing shingles. But, they join together along the top edge.
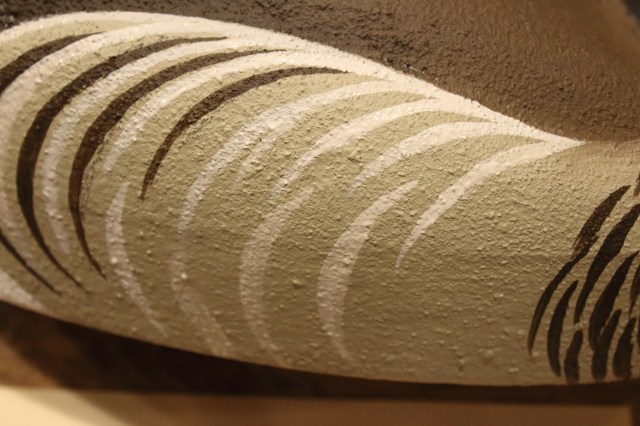
I fill in right to the smaller dark barring up forward – and even edge some of the dark bars with the Graceful Gray.
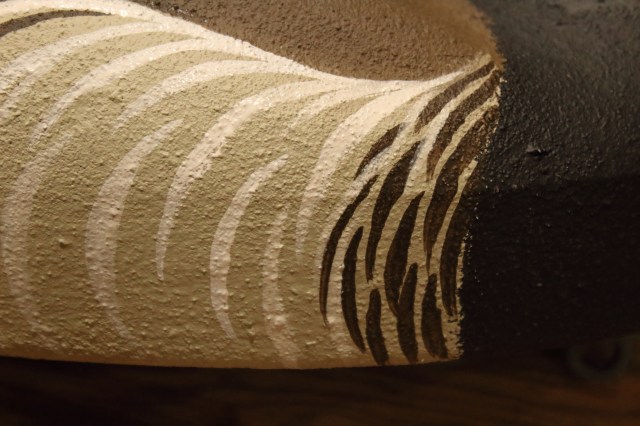
Jump to the port side and you’re done!
Painting ~ Part 3: The Necklace
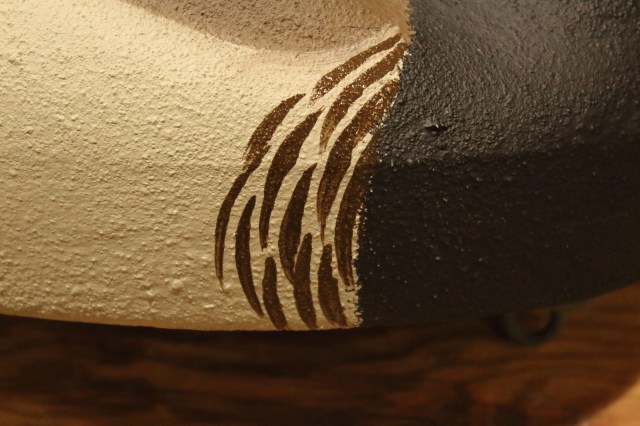
The White neck markings on a Brant are called its “necklace”. The size and shape vary – with age and geography. Young-of-the-year have the smallest necklaces, Black Brant have the largest. I paint all of mine like “tytpical” Atlantic Brant adults. The necklace is large but does not meet beneath the chin – as it does on many Black Brant. I begin with a curved chalk “baseline”. It is at the top of the neck and not on the cheek.
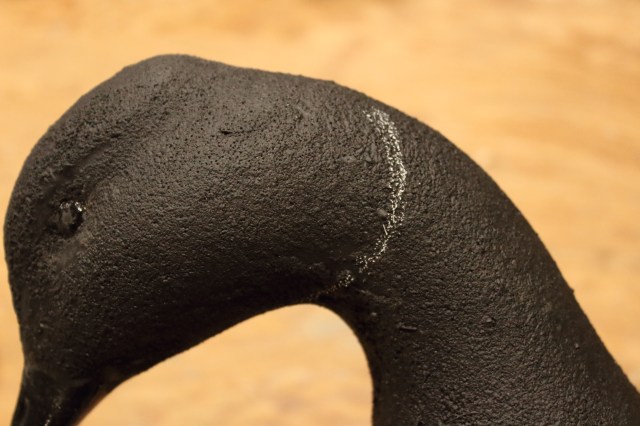
I paint the White baseline with a #4 round brush.
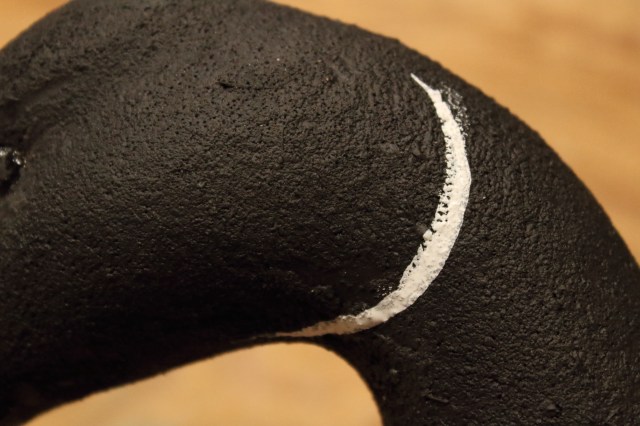
Then, beginning at the top, I paint short lines that curve downward and forward. They are about 1/4 inch from each other.
I paint each curve a little longer and heading more forward as I work my way down.

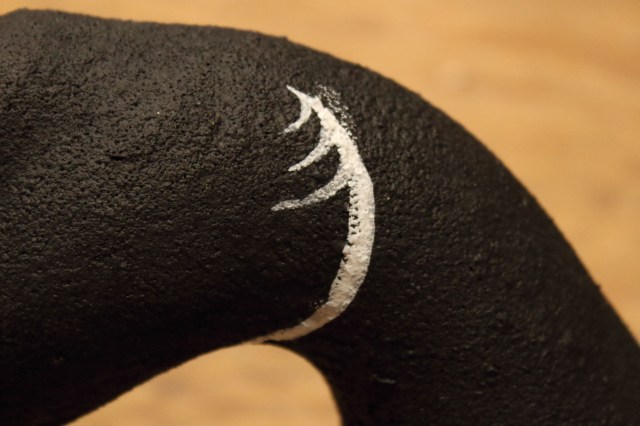
Now this feeding Btant is done – ready-to-hunt!
Unless…you want to have some fun and personalize the necklace. This bird goes to a good friend whose family roots are firmly planted in the sod of the Emerald Isle.
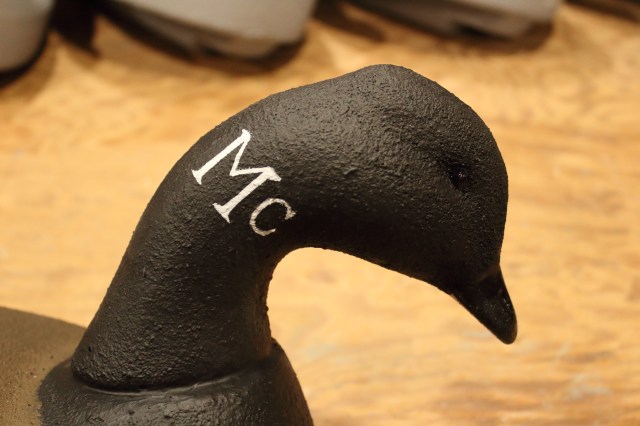
As always, I hope this information is helpful.
SJS
![]()
